By Steven Eschinger | April 13, 2017
This post was updated on September 18th, 2017 for Kubernetes version 1.7.6 & Kops version 1.7.0
Introduction
In the previous lab, we created an example continuous deployment pipeline for a Hugo site, using a locally installed instance of Jenkins in your Kubernetes cluster.
And in this lab, we will be recreating the same continuous deployment pipeline using Travis CI. Travis CI is a hosted continuous integration service used to build and test software projects that are stored in GitHub. It is free to use for any public GitHub repositories and they have commercial offerings if you want to use it for private repositories.
The Travis CI pipeline we will create will cover the same four stages that the Jenkins pipeline did in the previous lab:
- Build: Build the Hugo site
- Test: Test the Hugo site to confirm there are no broken links
- Push: Create a new Docker image with the Hugo site and push it to your Docker Hub repository
- Deploy: Trigger a rolling update to the new Docker image in your Kubernetes cluster
The configuration of the pipeline will be defined in a .travis.yml file in your Hugo site GitHub repository, similar to the Jenkinsfile we created for the Jenkins pipeline.
And as Travis CI is tightly integrated with GitHub, the pipeline will be automatically run every time there is a commit in your GitHub repository.
Activities
- Deploy a new cluster
- Create the Hugo site
- Create the GitHub repository for the Hugo site
- Create the .travis.yml file
- Create the Dockerfile
- Create the kubeconfig template file
- Deploy the Hugo site
- Configure the Travis CI pipeline
- Configure the required environment variables
- Test the Travis CI pipeline
- Delete the cluster
Warning: Some of the AWS resources that will be created in the following lab are not eligible for the AWS Free Tier and therefore will cost you money. For example, running a three node cluster with the suggested instance size of t2.medium will cost you around $0.20 per hour based on current pricing.
Prerequisites
Review the Getting Started section in the introductory post of this blog series
Log into the Vagrant box or your prepared local host environment
Update and then load the required environment variables:
# Must change: Your domain name that is hosted in AWS Route 53
export DOMAIN_NAME="k8s.kumorilabs.com"

# Friendly name to use as an alias for your cluster
export CLUSTER_ALIAS="usa"

# Leave as-is: Full DNS name of you cluster
export CLUSTER_FULL_NAME="${CLUSTER_ALIAS}.${DOMAIN_NAME}"

# AWS availability zone where the cluster will be created
export CLUSTER_AWS_AZ="us-east-1a"

# Leave as-is: AWS Route 53 hosted zone ID for your domain
export DOMAIN_NAME_ZONE_ID=$(aws route53 list-hosted-zones \
       | jq -r '.HostedZones[] | select(.Name=="'${DOMAIN_NAME}'.") | .Id' \
       | sed 's/\/hostedzone\///')
Implementation
Deploy a new cluster
Create the S3 bucket in AWS, which will be used by Kops for cluster configuration storage:
aws s3api create-bucket --bucket ${CLUSTER_FULL_NAME}-state
Set the KOPS_STATE_STORE variable to the URL of the S3 bucket that was just created:
export KOPS_STATE_STORE="s3://${CLUSTER_FULL_NAME}-state"
Create the cluster with Kops:
kops create cluster \
     --name=${CLUSTER_FULL_NAME} \
     --zones=${CLUSTER_AWS_AZ} \
     --master-size="t2.medium" \
     --node-size="t2.medium" \
     --node-count="2" \
     --dns-zone=${DOMAIN_NAME} \
     --ssh-public-key="~/.ssh/id_rsa.pub" \
     --kubernetes-version="1.7.6" --yes
It will take approximately 5 minutes for the cluster to be ready. To check if the cluster is ready:
kubectl get nodes
NAME                            STATUS    AGE       VERSION
ip-172-20-48-9.ec2.internal     Ready     4m        v1.7.6
ip-172-20-55-48.ec2.internal    Ready     2m        v1.7.6
ip-172-20-58-241.ec2.internal   Ready     3m        v1.7.6
Create the Hugo site
In this lab, we will create a Hugo site with the same theme (Material Docs by Digitalcraftsman) that we used in previous labs.
From the root of the repository, execute the following, which will:
- Create a new blank Hugo site in the
hugo-app-travis/folder - Clone the Material Docs Hugo theme to the themes folder (
hugo-app-travis/themes) - Copy the example content from the Material Docs theme to the root of the Hugo site
- Remove the Git folder from the Material Docs theme
- Change the value of the
baseurlin the Hugo config file to ensure the site will work with any domain
hugo new site hugo-app-travis/

git clone https://github.com/digitalcraftsman/hugo-material-docs.git \
    hugo-app-travis/themes/hugo-material-docs

cp -rf hugo-app-travis/themes/hugo-material-docs/exampleSite/* hugo-app-travis/
rm -rf hugo-app-travis/themes/hugo-material-docs/.git/
sed -i -e 's|baseurl =.*|baseurl = "/"|g' hugo-app-travis/config.toml
Create the GitHub repository for the Hugo site
Configure your global Git settings with your username, email and set the password cache to 60 minutes:
# Set your GitHub username and email
export GITHUB_USERNAME="smesch"
export GITHUB_EMAIL="steven@kumorilabs.com"

git config --global user.name "${GITHUB_USERNAME}"
git config --global user.email "${GITHUB_EMAIL}"
git config --global credential.helper cache
git config --global credential.helper 'cache --timeout=3600'
Create a new GitHub repository called hugo-app-travis in your GitHub account (you will be prompted for your GitHub password):
curl -u "${GITHUB_USERNAME}" https://api.github.com/user/repos \
     -d '{"name":"hugo-app-travis"}'
Create the README.md file and then upload the contents of the Hugo site (hugo-app-travis/) to the GitHub repository you just created (you will be prompted for your GitHub credentials):
echo "# hugo-app-travis" > hugo-app-travis/README.md
git -C hugo-app-travis/ init
git -C hugo-app-travis/ add .
git -C hugo-app-travis/ commit -m "Create Hugo site repository"
git -C hugo-app-travis/ remote add origin \
    https://github.com/${GITHUB_USERNAME}/hugo-app-travis.git
git -C hugo-app-travis/ push -u origin master
You now have your own repository populated with the Hugo site content.
Create the .travis.yml file
Now let’s have a look at the .travis.yml file that we will add to your repository:
sudo: required

services:
  - docker

os:
- linux

env:
  global:
    - DOCKER_IMAGE_NAME="hugo-app-travis"
    - K8S_DEPLOYMENT_NAME="hugo-app"

before_script:
- docker pull smesch/hugo
- docker pull smesch/html-proofer
- docker pull smesch/kubectl
- docker login -u "${DOCKER_USERNAME}" -p "${DOCKER_PASSWORD}"

script:
- docker run -v ${TRAVIS_BUILD_DIR}:/hugo_root smesch/hugo hugo -s /hugo_root
- docker run -v ${TRAVIS_BUILD_DIR}/public:/public smesch/html-proofer htmlproofer /public --external_only --only-4xx

after_script:
- docker build -t ${DOCKER_USERNAME}/${DOCKER_IMAGE_NAME}:${TRAVIS_BUILD_ID} .
- docker push ${DOCKER_USERNAME}/${DOCKER_IMAGE_NAME}:${TRAVIS_BUILD_ID}
- docker tag ${DOCKER_USERNAME}/${DOCKER_IMAGE_NAME}:${TRAVIS_BUILD_ID} ${DOCKER_USERNAME}/${DOCKER_IMAGE_NAME}:latest
- docker push ${DOCKER_USERNAME}/${DOCKER_IMAGE_NAME}:latest
- sed -i -e 's|KUBE_CA_CERT|'"${KUBE_CA_CERT}"'|g' kubeconfig
- sed -i -e 's|KUBE_ENDPOINT|'"${KUBE_ENDPOINT}"'|g' kubeconfig
- sed -i -e 's|KUBE_ADMIN_CERT|'"${KUBE_ADMIN_CERT}"'|g' kubeconfig
- sed -i -e 's|KUBE_ADMIN_KEY|'"${KUBE_ADMIN_KEY}"'|g' kubeconfig
- sed -i -e 's|KUBE_USERNAME|'"${KUBE_USERNAME}"'|g' kubeconfig
- docker run -v ${TRAVIS_BUILD_DIR}:/kube smesch/kubectl kubectl --kubeconfig /kube/kubeconfig set image deployment/${K8S_DEPLOYMENT_NAME} ${K8S_DEPLOYMENT_NAME}=${DOCKER_USERNAME}/${DOCKER_IMAGE_NAME}:$TRAVIS_BUILD_ID
Breakdown of the .travis.yml file
- Define that the Docker service will be used
- Set env variable for the name that will be used when creating new Docker images (hugo-app-travis)
- Set env variable for the name of the Kubernetes Deployment in your cluster (hugo-app)
- Pull the Docker images for hugo, html-proofer & kubectl
- Login to the Docker Hub
- Build the Hugo site from your repository and output the static HTML to the default folder public
- Run html-proofer against the public folder to test external links
- Build a new Docker image with the new version of the site, using the Dockerfile in the repository
- Push the new Docker image to your Docker Hub account using both the build number and latest as the tags
- Populate the kubeconfig template file with the value of the env variables we will configure for cluster authentication
- Start a rolling update for the Kubernetes Deployment, using the new Docker image with the build number tag
Copy the .travis.yml file to your GitHub repo folder:
cp github/hugo-app-travis/.travis.yml hugo-app-travis/.travis.yml
Create the Dockerfile
Below is the Dockerfile that will be used by Travis CI for the Docker image build:
FROM nginx:alpine
MAINTAINER Steven Eschinger <steven@kumorilabs.com>
COPY public /usr/share/nginx/html
Breakdown of the Dockerfile
- Use the nginx:apline image as a base
- Copy the static HTML content of the Hugo site from the public folder to the default NGINX folder
Copy the Dockerfile to your GitHub repo folder:
cp github/hugo-app-travis/Dockerfile hugo-app-travis/Dockerfile
Update MAINTAINER with your name and email:
vi hugo-app-travis/Dockerfile
...
MAINTAINER Steven Eschinger <steven@kumorilabs.com>
...
Create the kubeconfig template file
And below is the kubeconfig template file that will be used by Travis CI to authenticate with your cluster:
apiVersion: v1
clusters:
- cluster:
    certificate-authority-data: KUBE_CA_CERT
    server: KUBE_ENDPOINT
  name: k8s-cluster
contexts:
- context:
    cluster: k8s-cluster
    user: k8s-cluster
  name: k8s-cluster
current-context: k8s-cluster
kind: Config
preferences: {}
users:
- name: k8s-cluster
  user:
    client-certificate-data: KUBE_ADMIN_CERT
    client-key-data: KUBE_ADMIN_KEY
    username: KUBE_USERNAME
There are five placeholders in the kubeconfig template file, which will be replaced by the values we will configure for environment variables in the Travis CI job configuration:
Kubeconfig Placeholders
- certificate-authority-data: KUBE_CA_CERT
- server: KUBE_ENDPOINT
- client-certificate-data: KUBE_ADMIN_CERT
- client-key-data: KUBE_ADMIN_KEY
- username: KUBE_USERNAME
Copy the kubeconfig to your GitHub repo folder:
cp github/hugo-app-travis/kubeconfig hugo-app-travis/kubeconfig
And finally, commit the three files to GitHub:
git -C hugo-app-travis/ add .
git -C hugo-app-travis/ commit -m "Upload .travis.yml, Dockerfile & kubeconfig"
git -C hugo-app-travis/ push -u origin master
Deploy the Hugo site
Create the initial Deployment of the Hugo site:
kubectl create -f ./kubernetes/hugo-app/
deployment "hugo-app" created
service "hugo-app-svc" created
Wait about a minute for the Service to create the AWS ELB and then create the DNS CNAME record in your Route 53 domain with a prefix of hugo (e.g., hugo.k8s.kumorilabs.com), using the dns-record-single.json template file in the repository:
# Set the DNS record prefix & the Service name and then retrieve the ELB URL
export DNS_RECORD_PREFIX="hugo"
export SERVICE_NAME="hugo-app-svc"
export HUGO_APP_ELB=$(kubectl get svc/${SERVICE_NAME} \
       --template="{{range .status.loadBalancer.ingress}} {{.hostname}} {{end}}")

# Add to JSON file
sed -i -e 's|"Name": ".*|"Name": "'"${DNS_RECORD_PREFIX}.${DOMAIN_NAME}"'",|g' \
    scripts/apps/dns-records/dns-record-single.json
sed -i -e 's|"Value": ".*|"Value": "'"${HUGO_APP_ELB}"'"|g' \
    scripts/apps/dns-records/dns-record-single.json

# Create DNS records
aws route53 change-resource-record-sets \
    --hosted-zone-id ${DOMAIN_NAME_ZONE_ID} \
    --change-batch file://scripts/apps/dns-records/dns-record-single.json
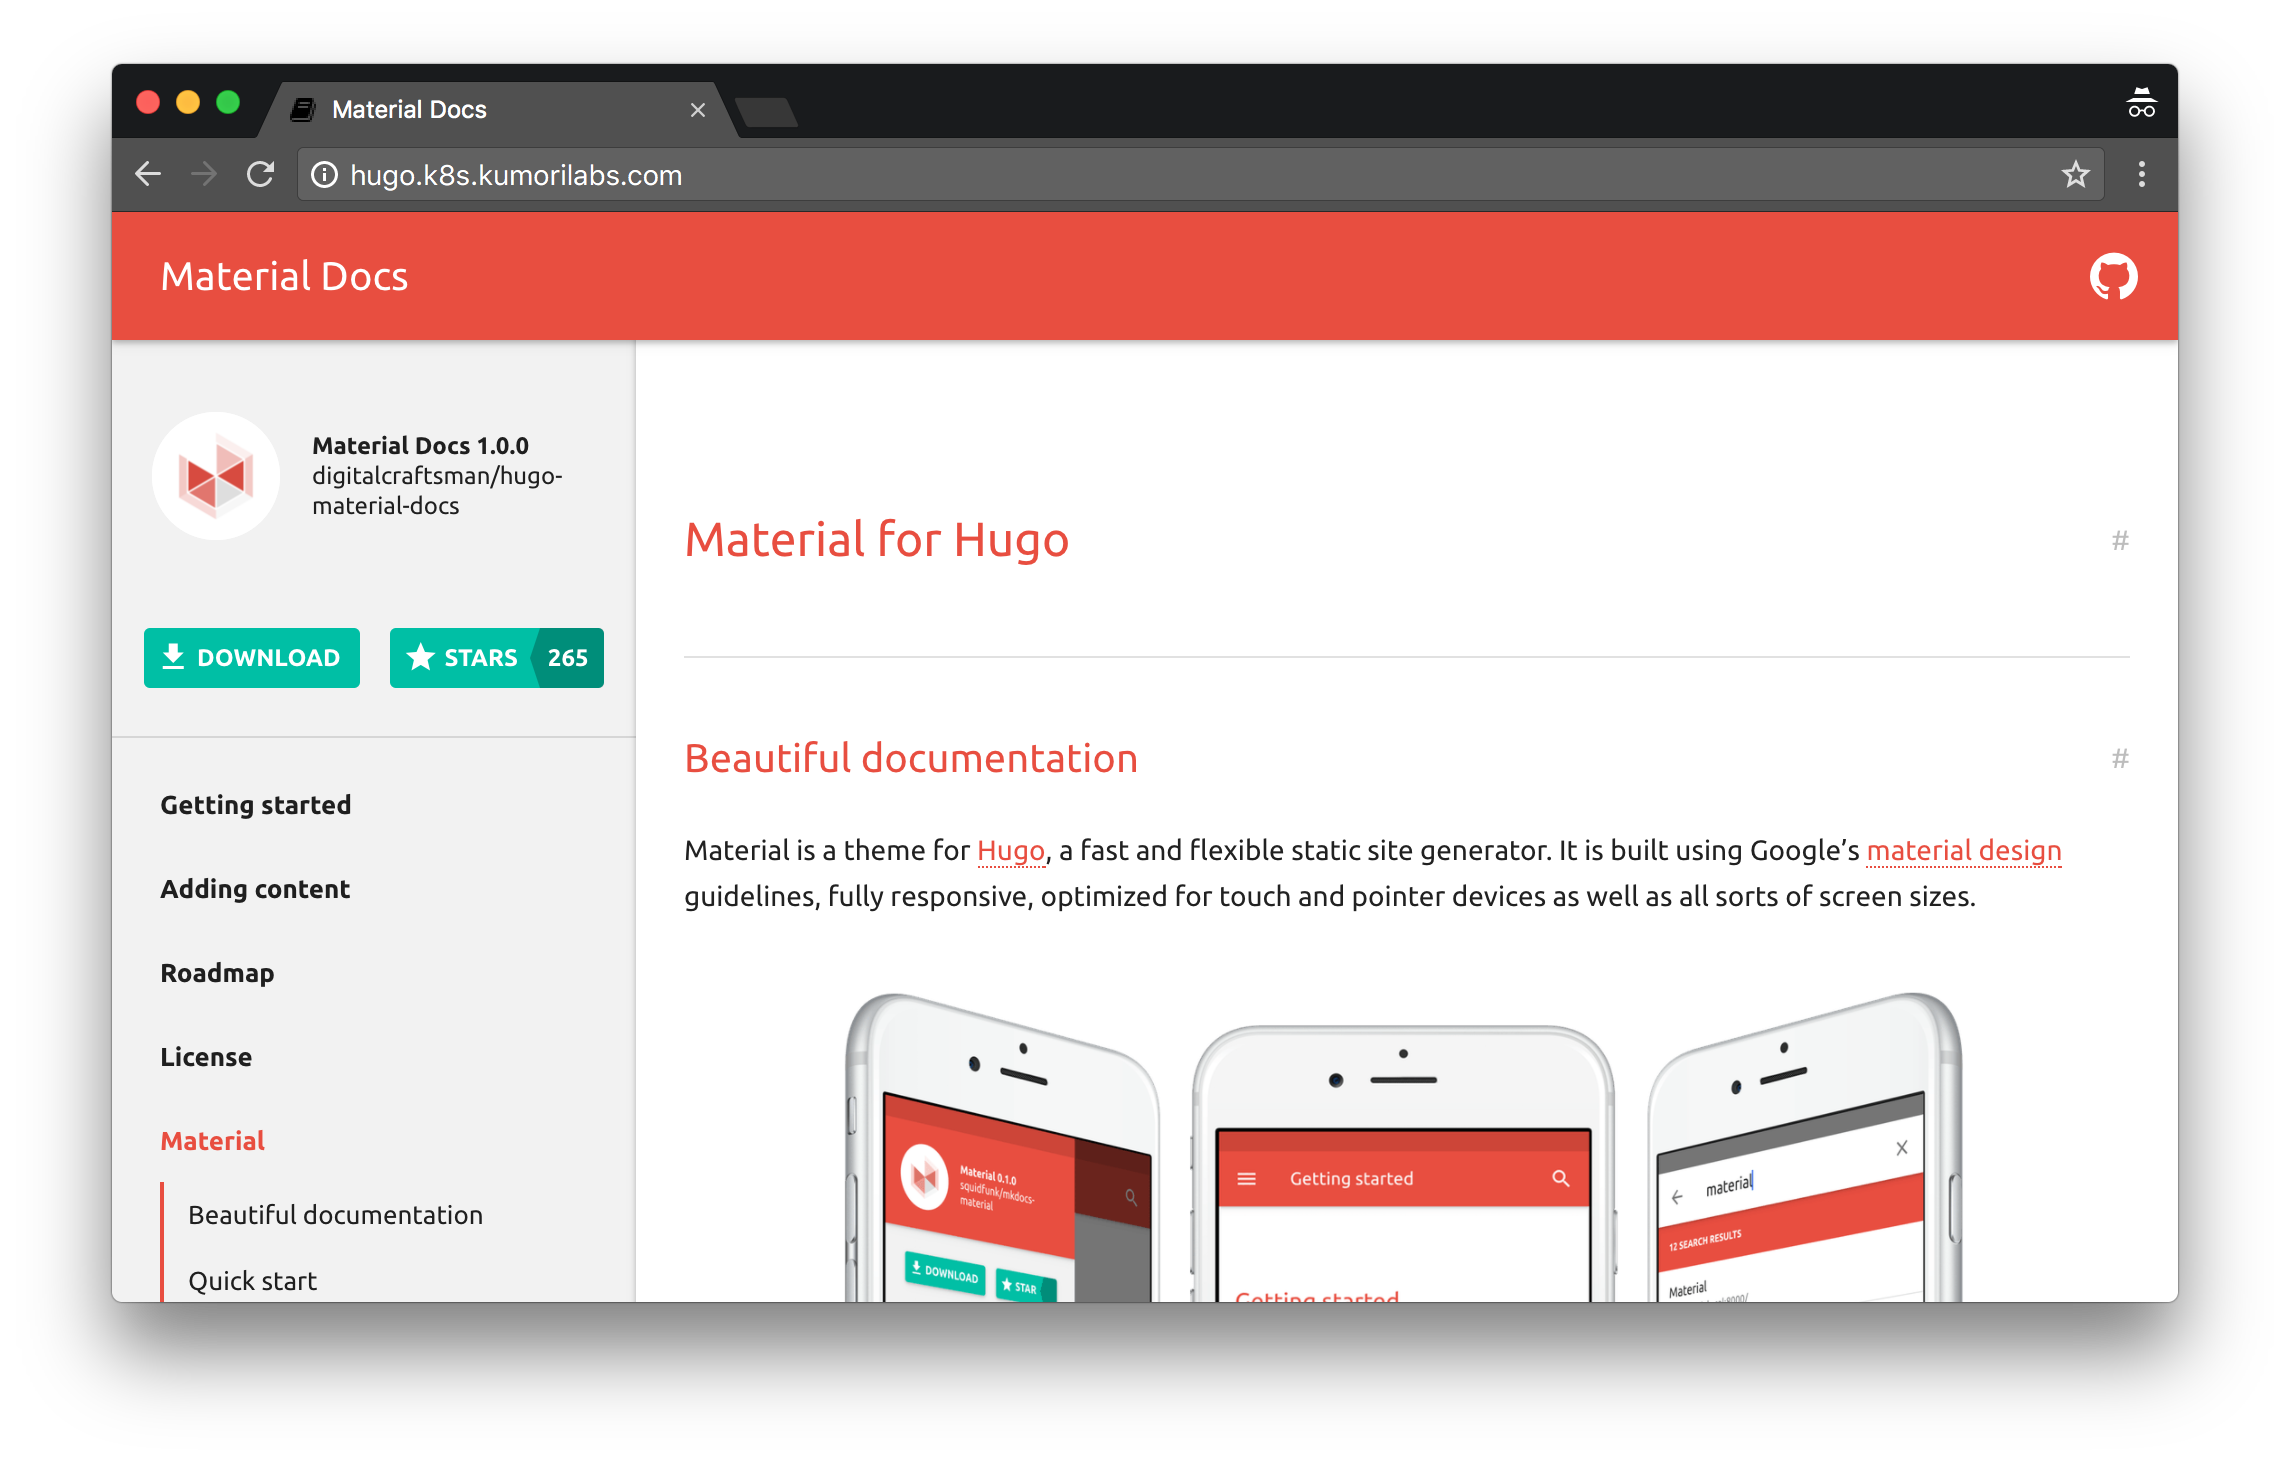
The Hugo site should now be reachable at the DNS name you just created (e.g., hugo.k8s.kumorilabs.com) and as we used the default 1.0 Docker image tag, the theme will be red:
Configure the Travis CI pipeline
Let’s now configure the pipeline in Travis CI.
Browse to the Travis CI site:
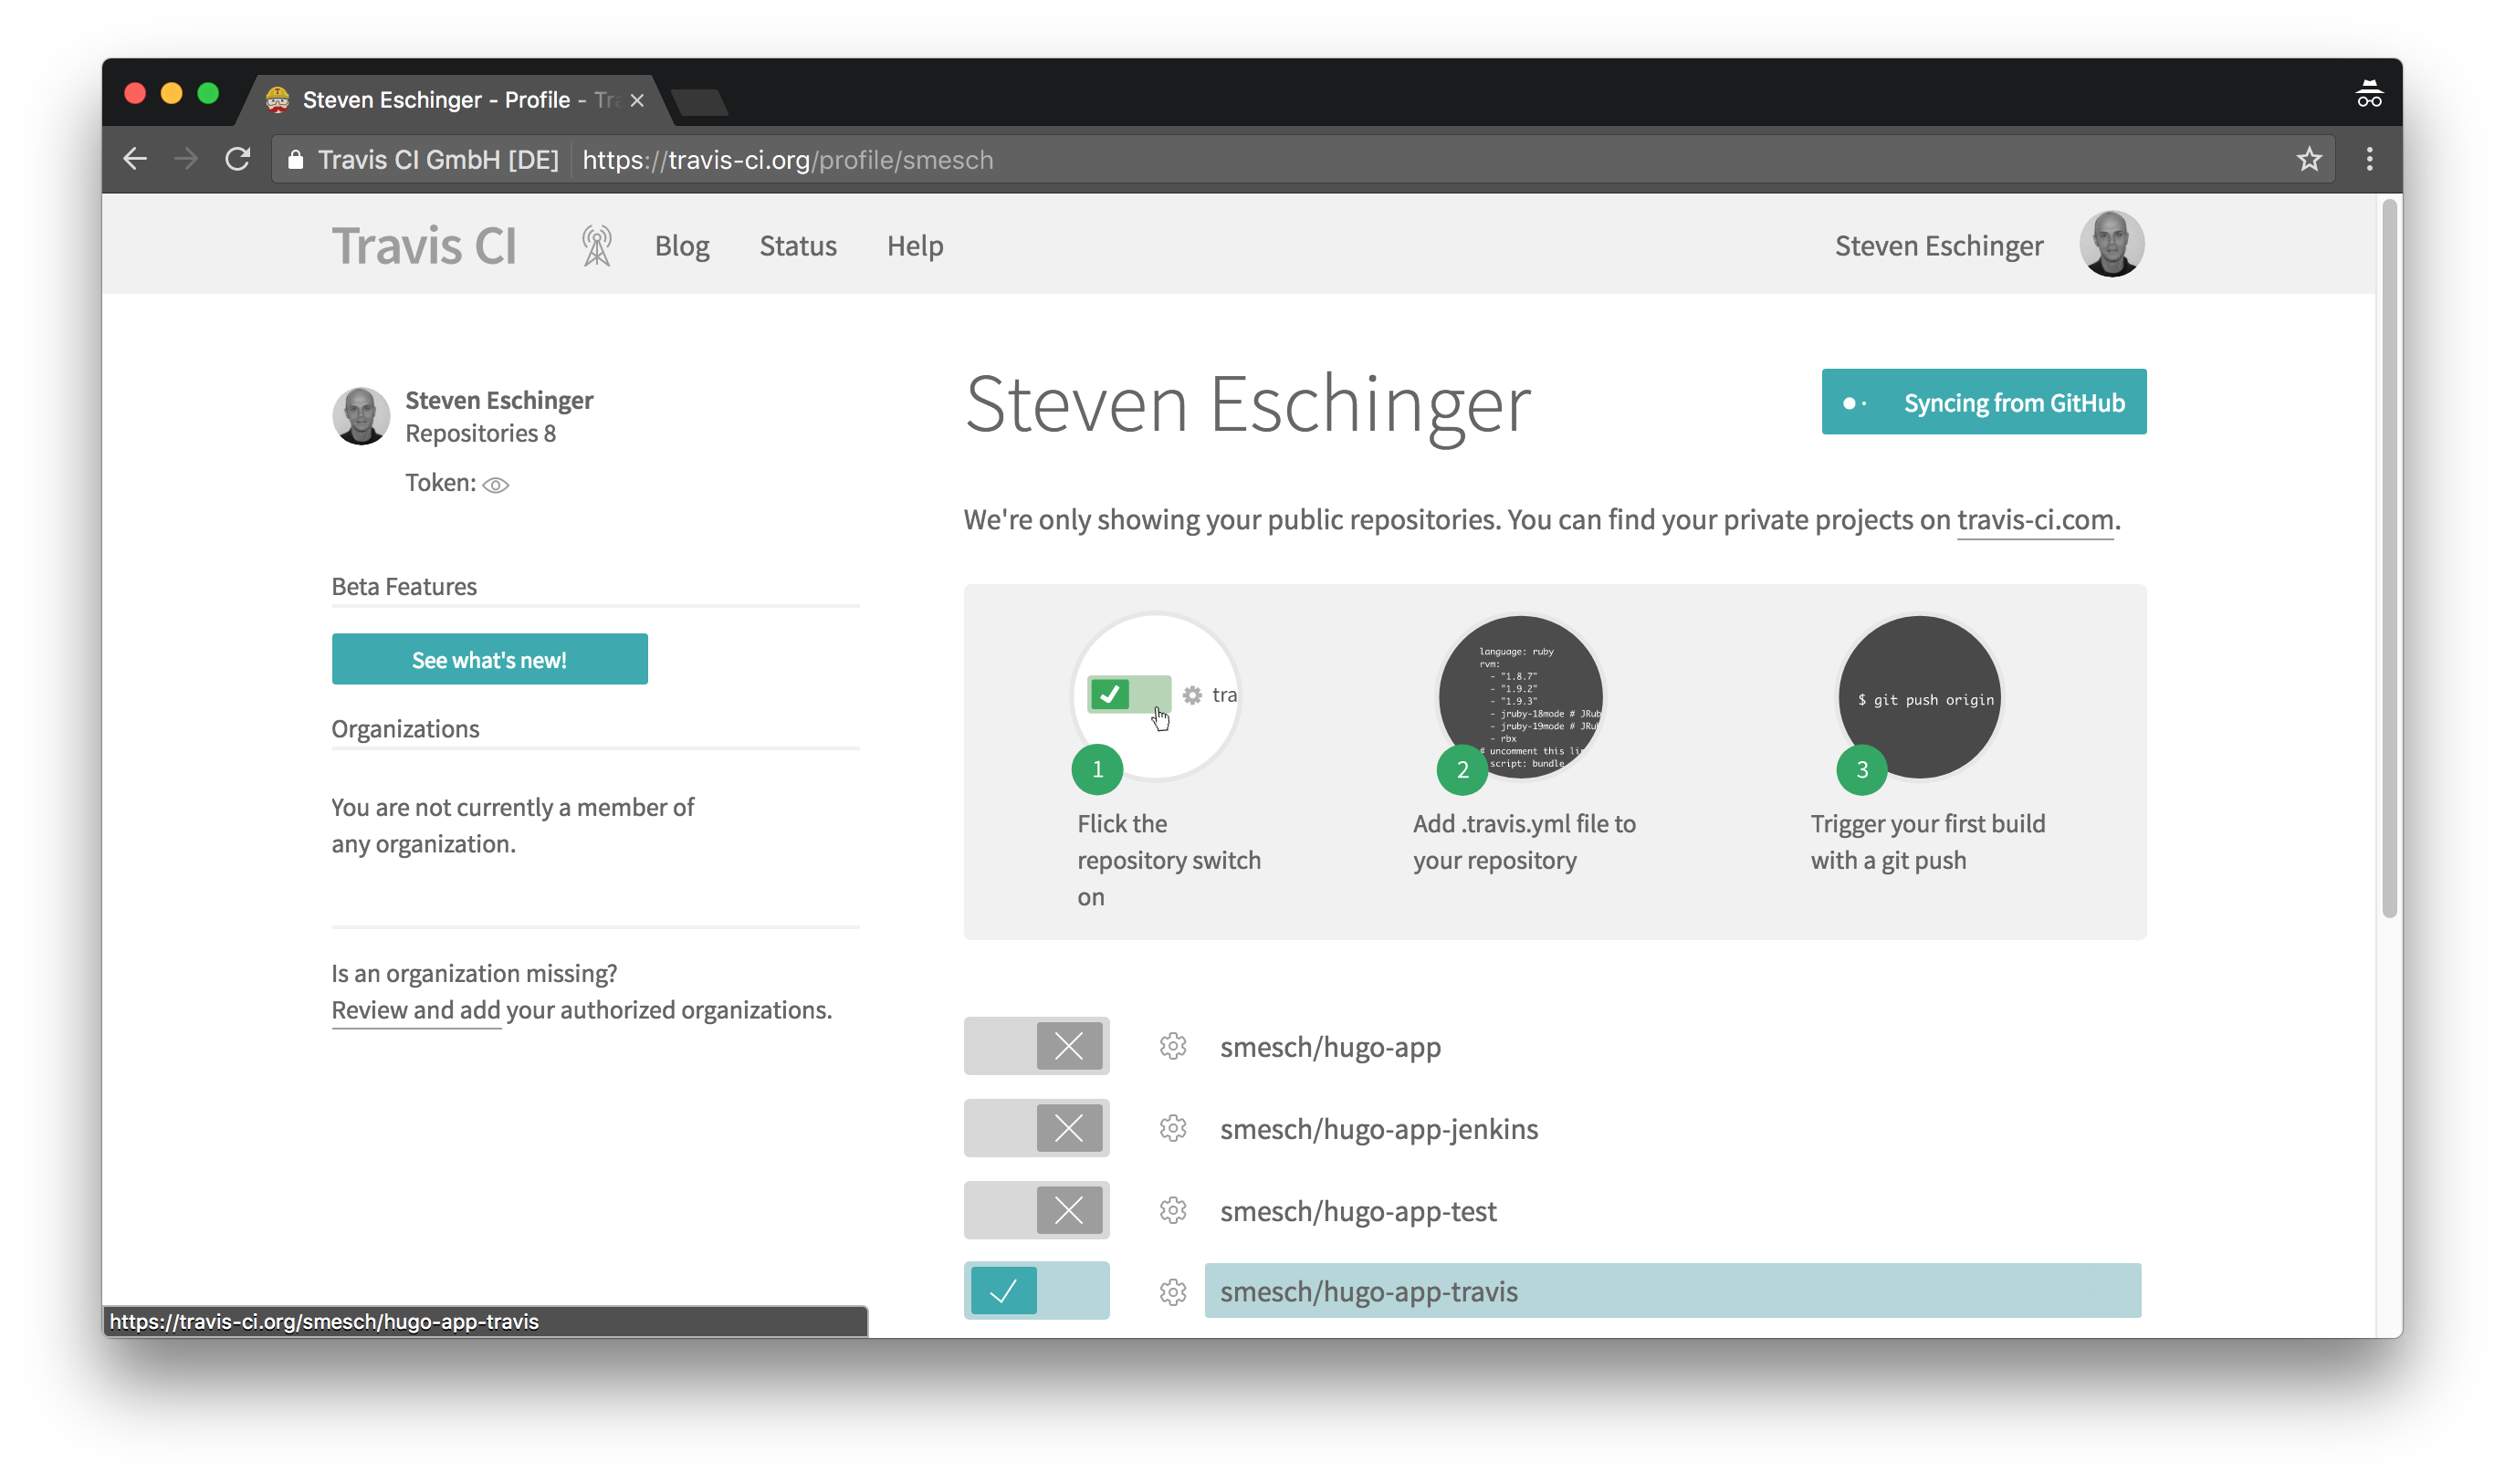
- Login with your GitHub credentials
- Hover over your name in the navigation bar and click Accounts
- Click the button next to your hugo-app-travis repository to enable it
- Click on the settings gear icon next to your hugo-app-travis repository
Configure the required environment variables
Before we populate the required environment variables for Docker Hub and your Kubernetes cluster, we need to retrieve some information from the kubeconfig file for your cluster. We will use kubectl to extract the required values from your kubeconfig and set them to local environment variables on your host:
export KUBE_CA_CERT=$(kubectl config view --flatten --output=json \
       | jq --raw-output '.clusters[0] .cluster ["certificate-authority-data"]')
export KUBE_ENDPOINT=$(kubectl config view --flatten --output=json \
       | jq --raw-output '.clusters[0] .cluster ["server"]')
export KUBE_ADMIN_CERT=$(kubectl config view --flatten --output=json \
       | jq --raw-output '.users[0] .user ["client-certificate-data"]')
export KUBE_ADMIN_KEY=$(kubectl config view --flatten --output=json \
       | jq --raw-output '.users[0] .user ["client-key-data"]')
export KUBE_USERNAME=$(kubectl config view --flatten --output=json \
       | jq --raw-output '.users[0] .user ["username"]')
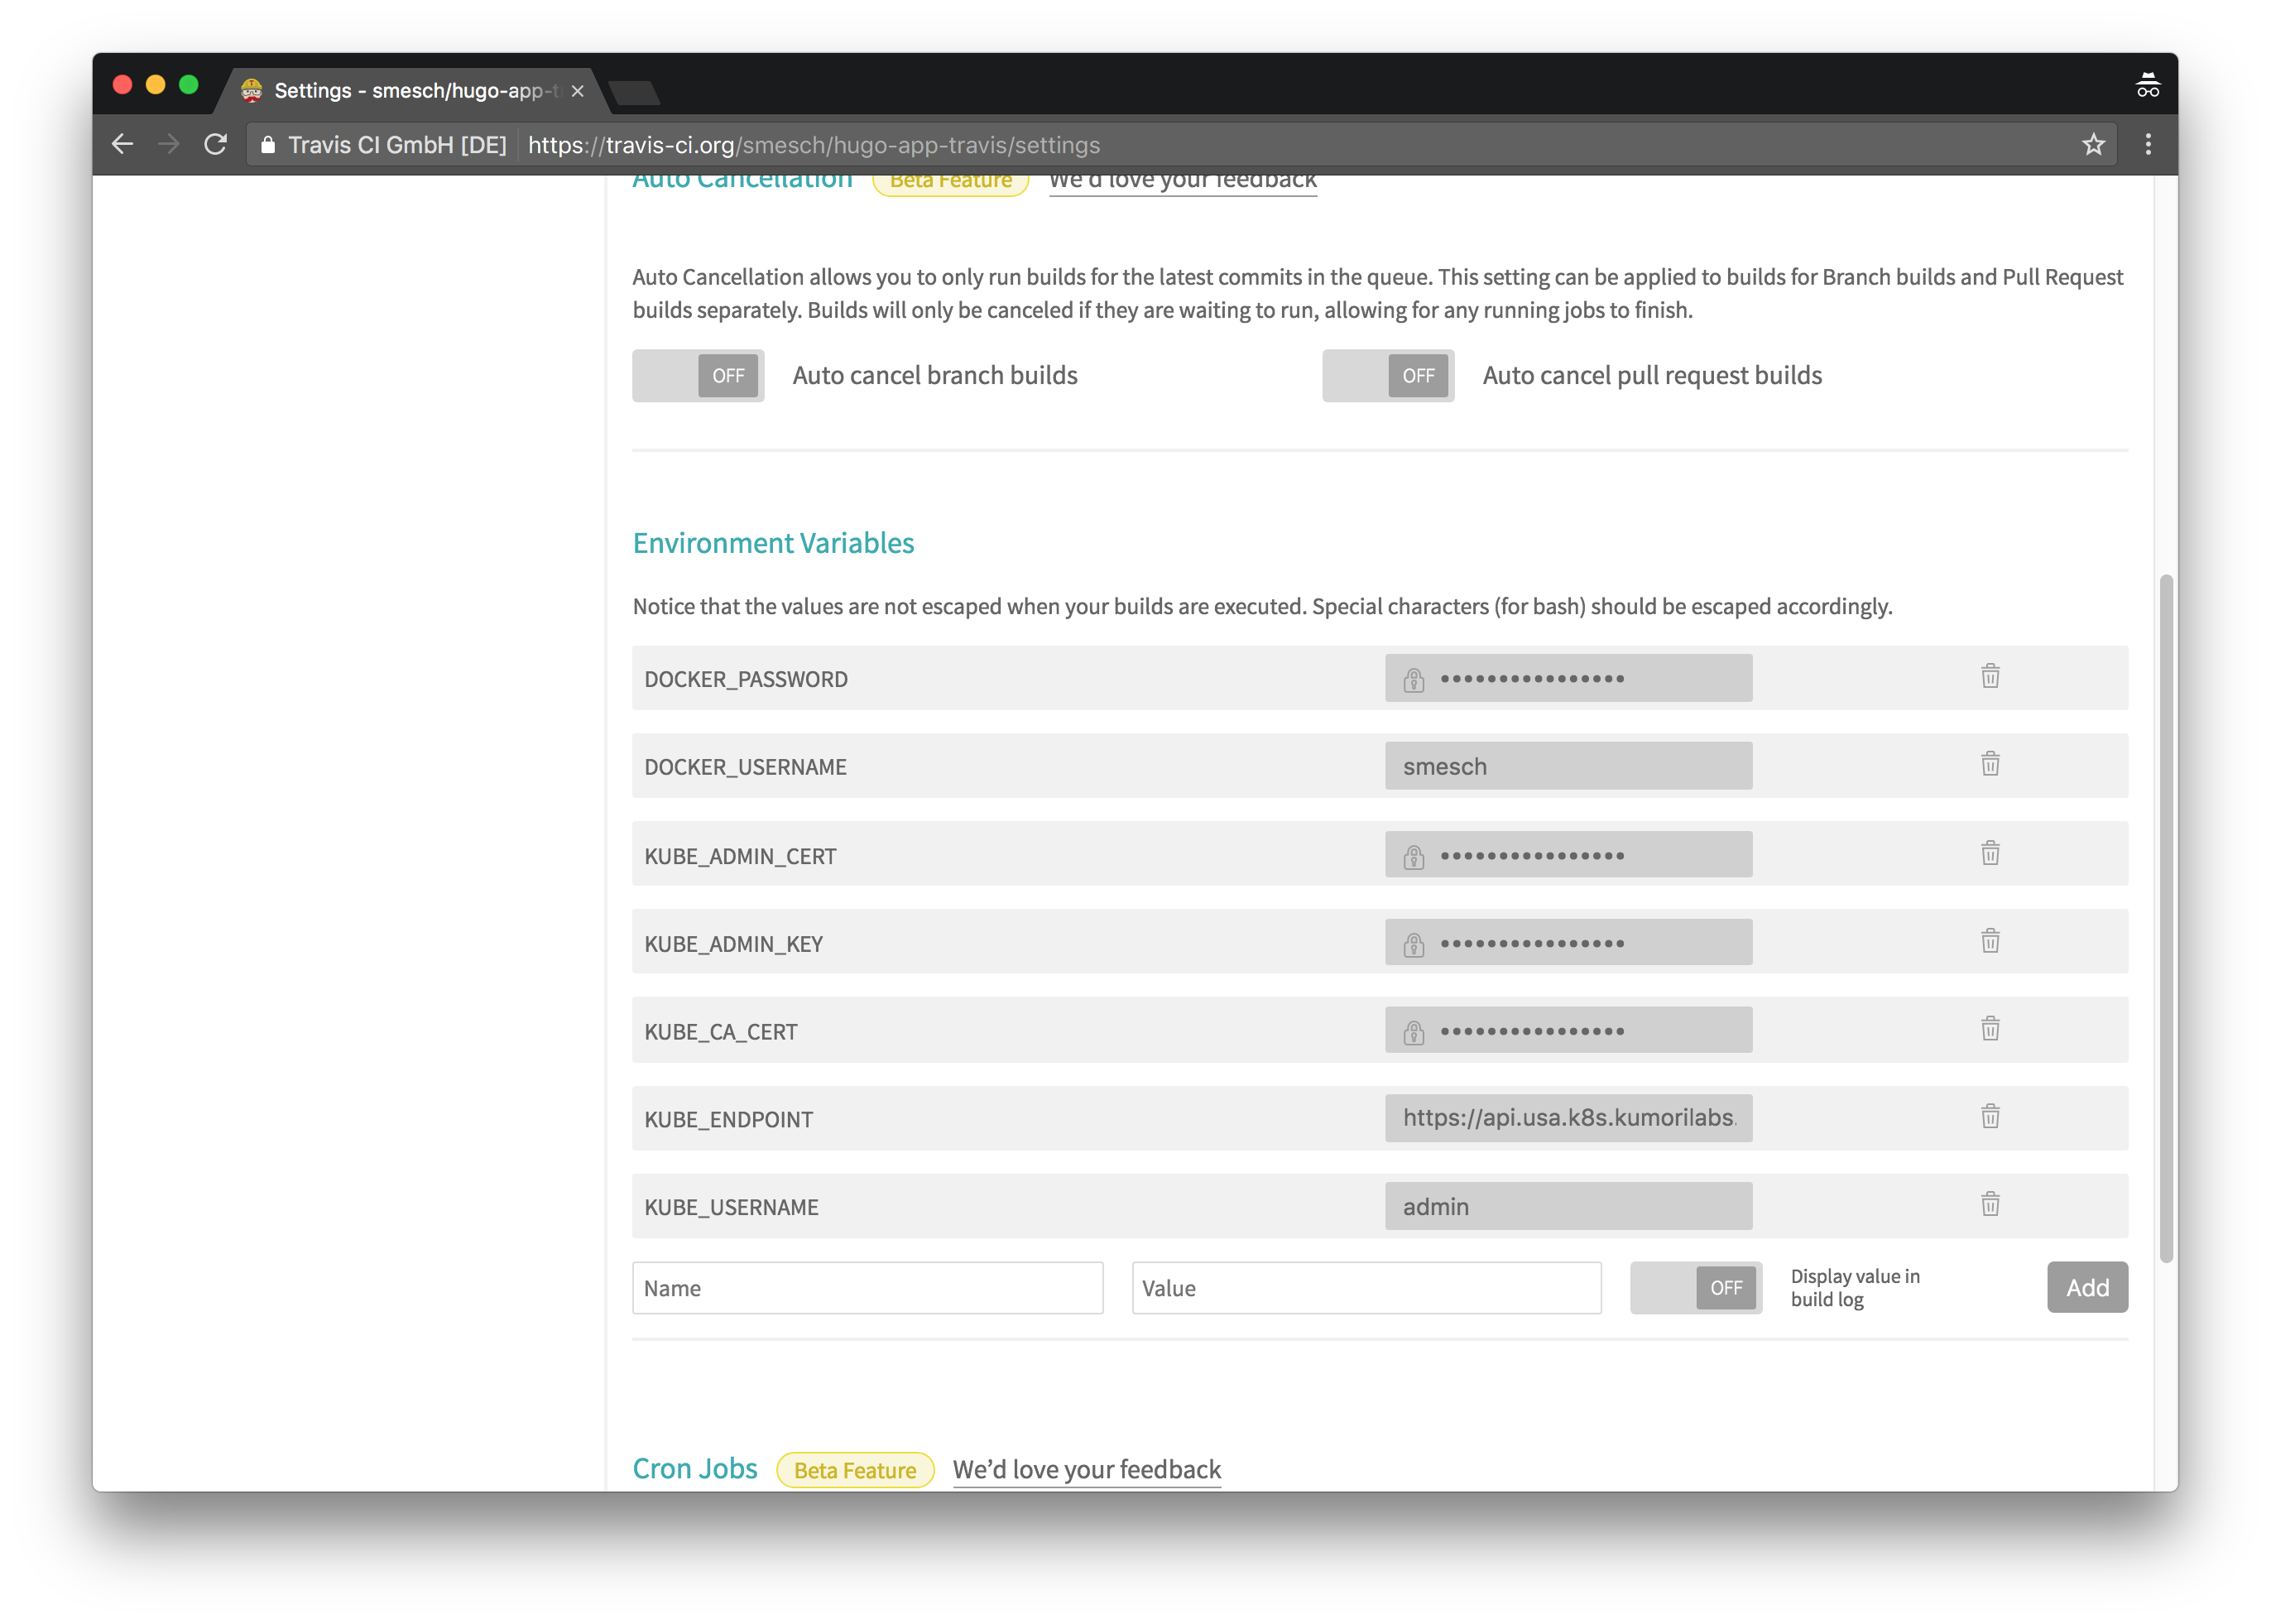
You can now echo out each of these local variables to retrieve the values and then copy/paste them into the Environment Variables section on the Travis CI Settings page:
echo "KUBE_CA_CERT = $KUBE_CA_CERT"
echo "KUBE_ENDPOINT = $KUBE_ENDPOINT"
echo "KUBE_ADMIN_CERT = $KUBE_ADMIN_CERT"
echo "KUBE_ADMIN_KEY = $KUBE_ADMIN_KEY"
echo "KUBE_USERNAME = $KUBE_USERNAME"
In addition to the five environment variables for your Kubernetes cluster, you also need to add your Docker Hub username (DOCKER_USERNAME) and password (DOCKER_PASSWORD):
Test the Travis CI pipeline
We will now change the theme color to blue in the Hugo config file and then commit the change to your GitHub repository (you will be prompted for your GitHub credentials):
export HUGO_APP_TAG="blue"
sed -i -e 's|primary = .*|primary = "'"${HUGO_APP_TAG}"'"|g' \
    hugo-app-travis/config.toml
git -C hugo-app-travis/ pull
git -C hugo-app-travis/ commit -a -m "Set theme color to ${HUGO_APP_TAG}"
git -C hugo-app-travis/ push -u origin master
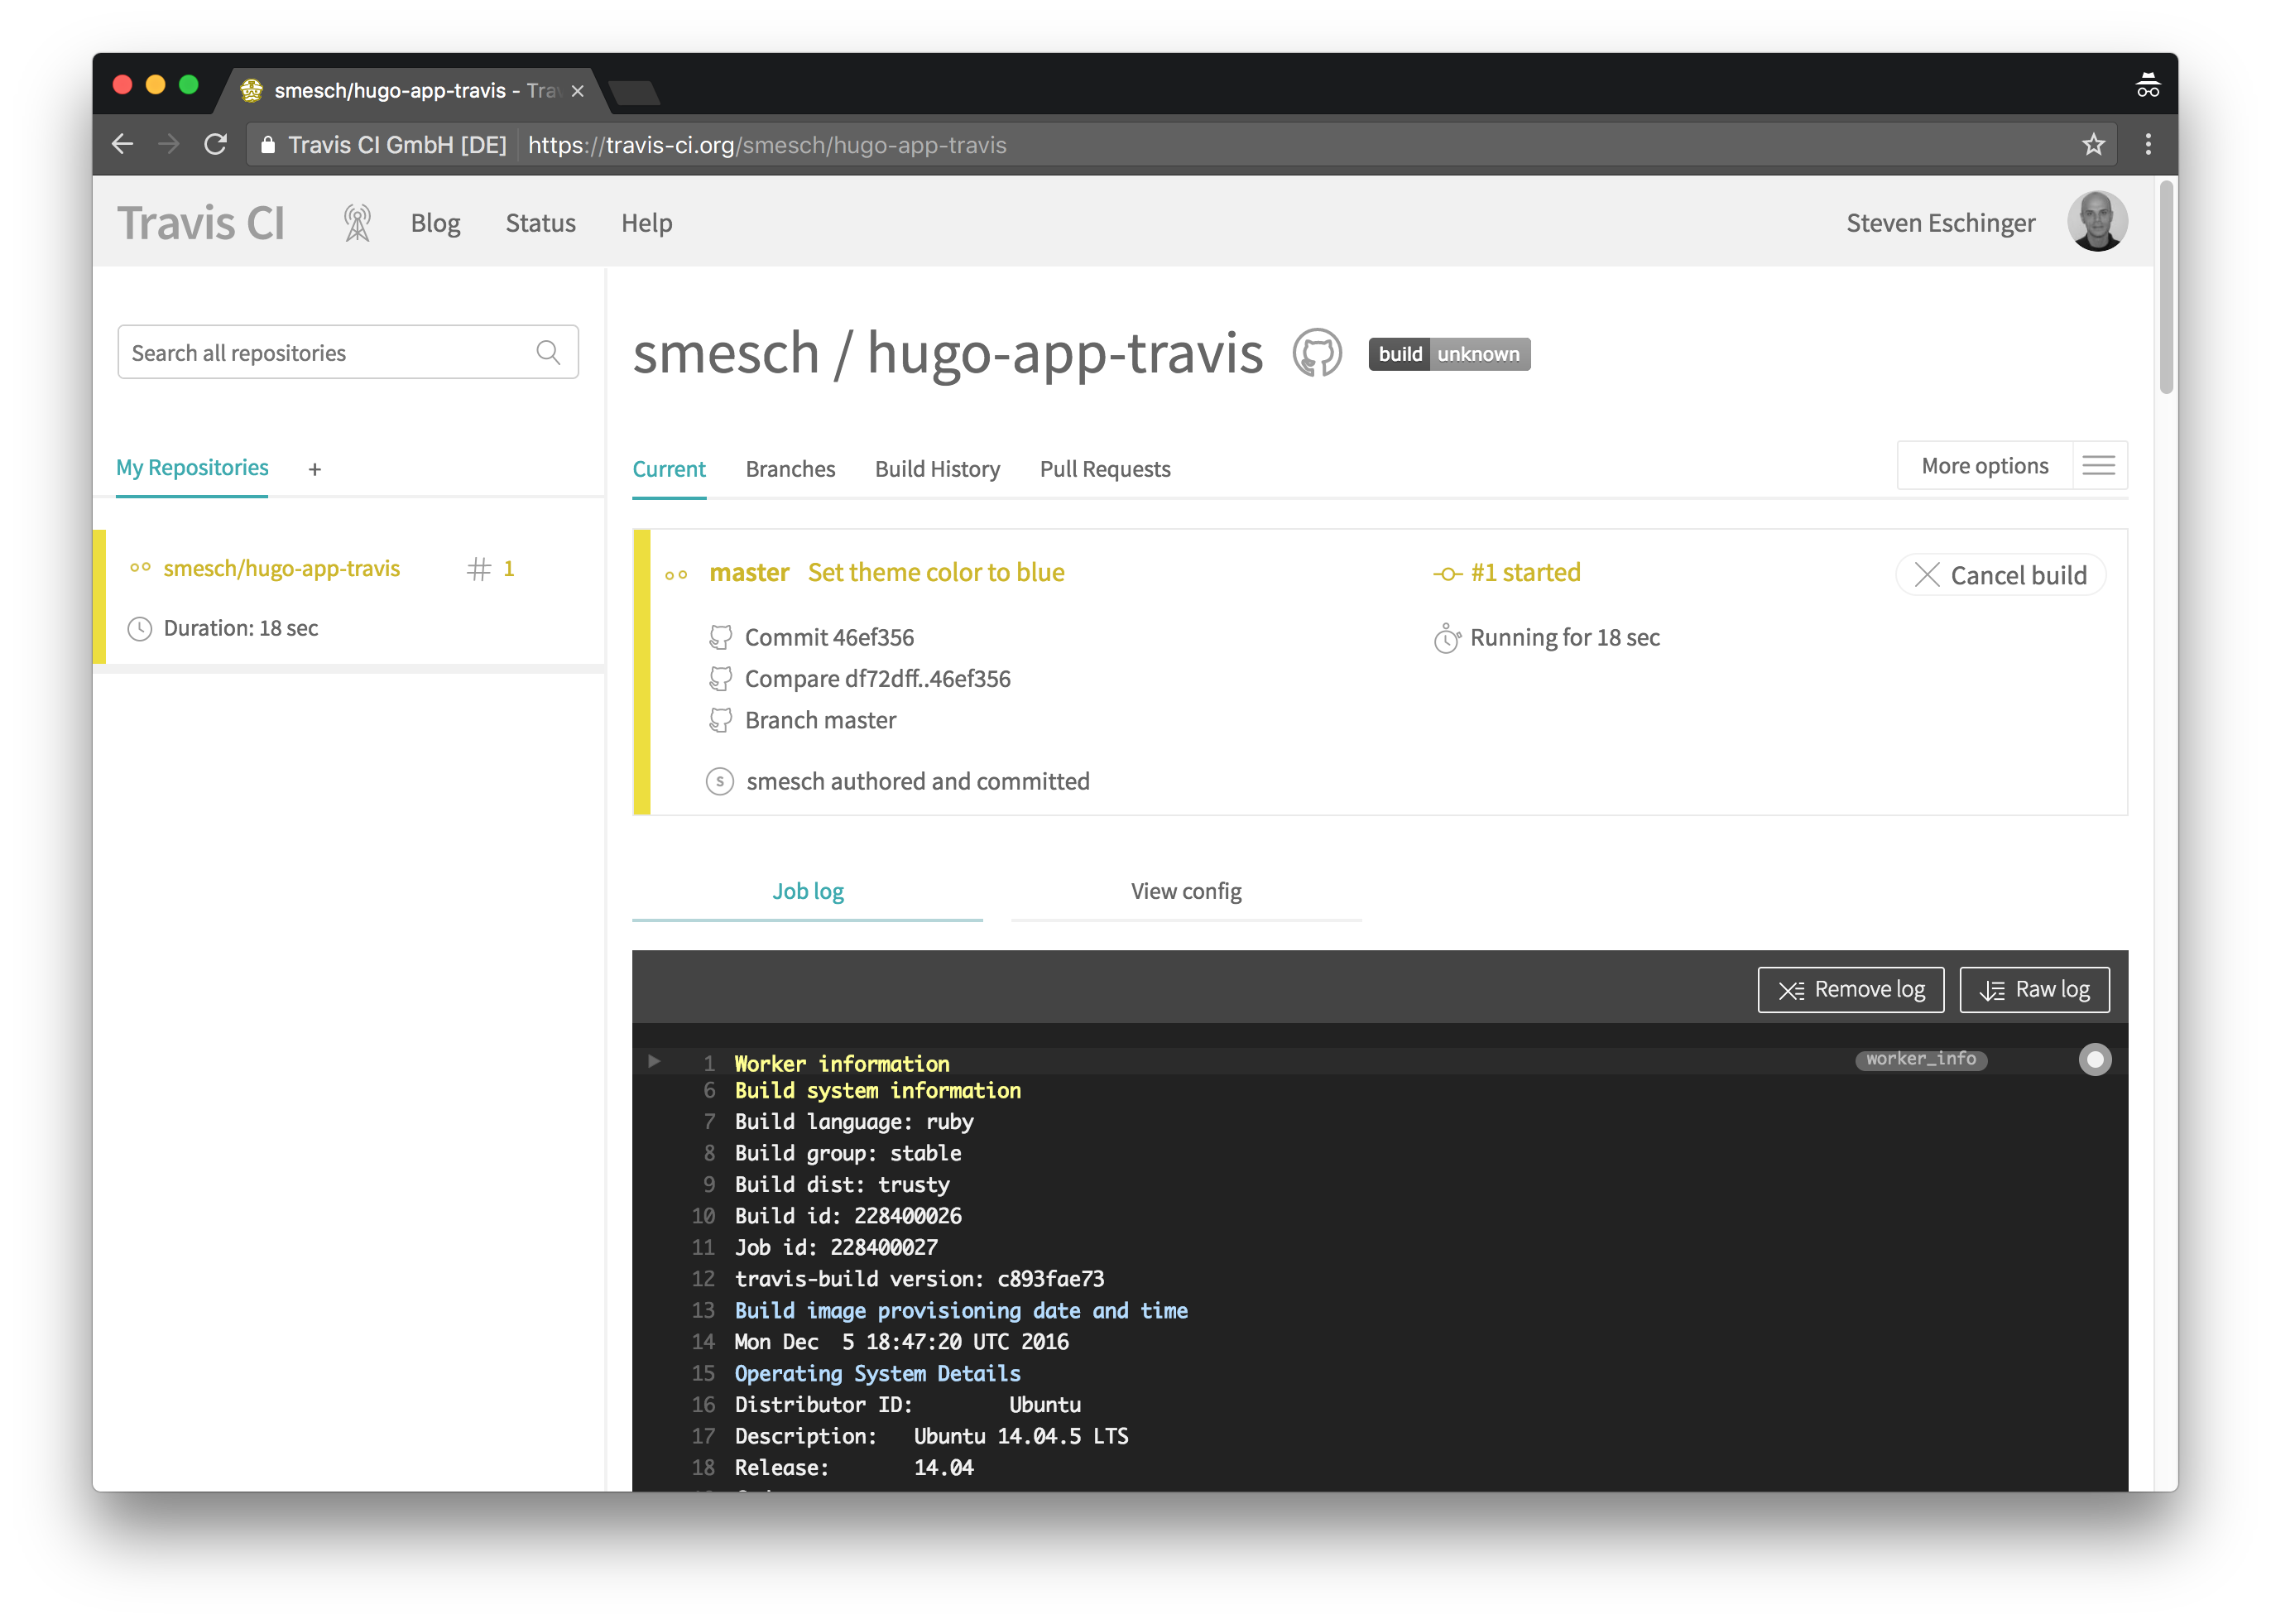
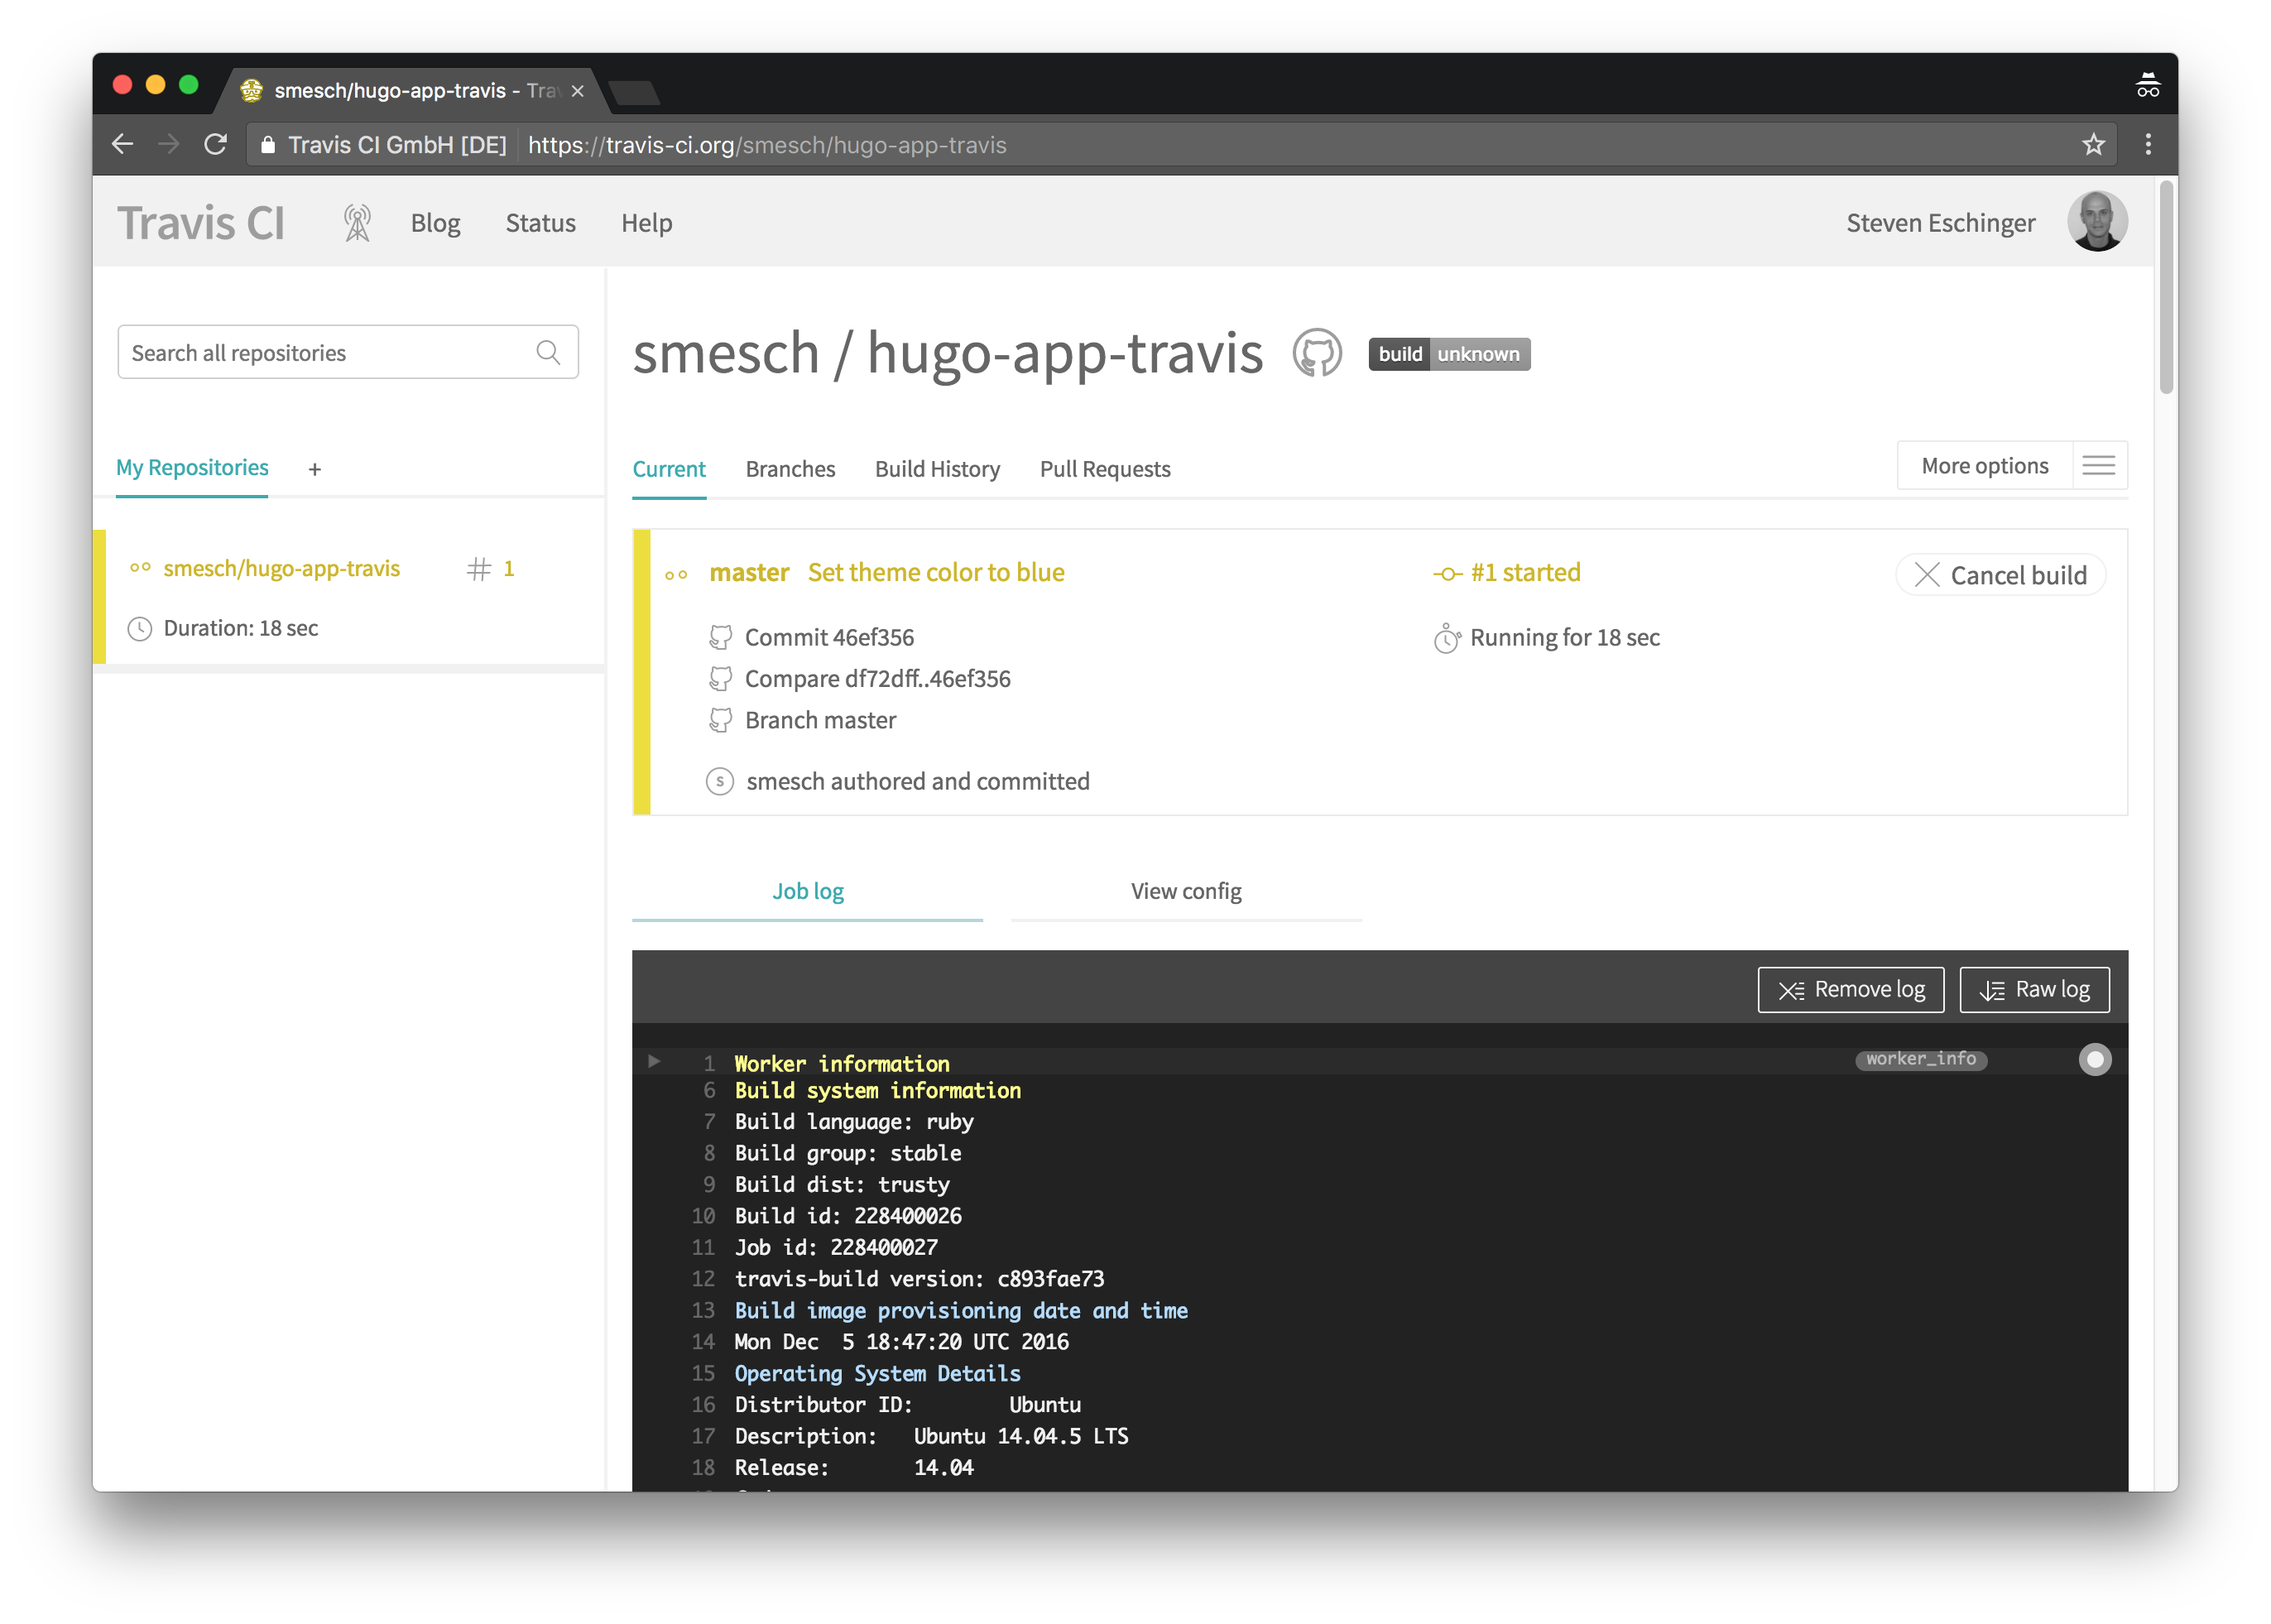
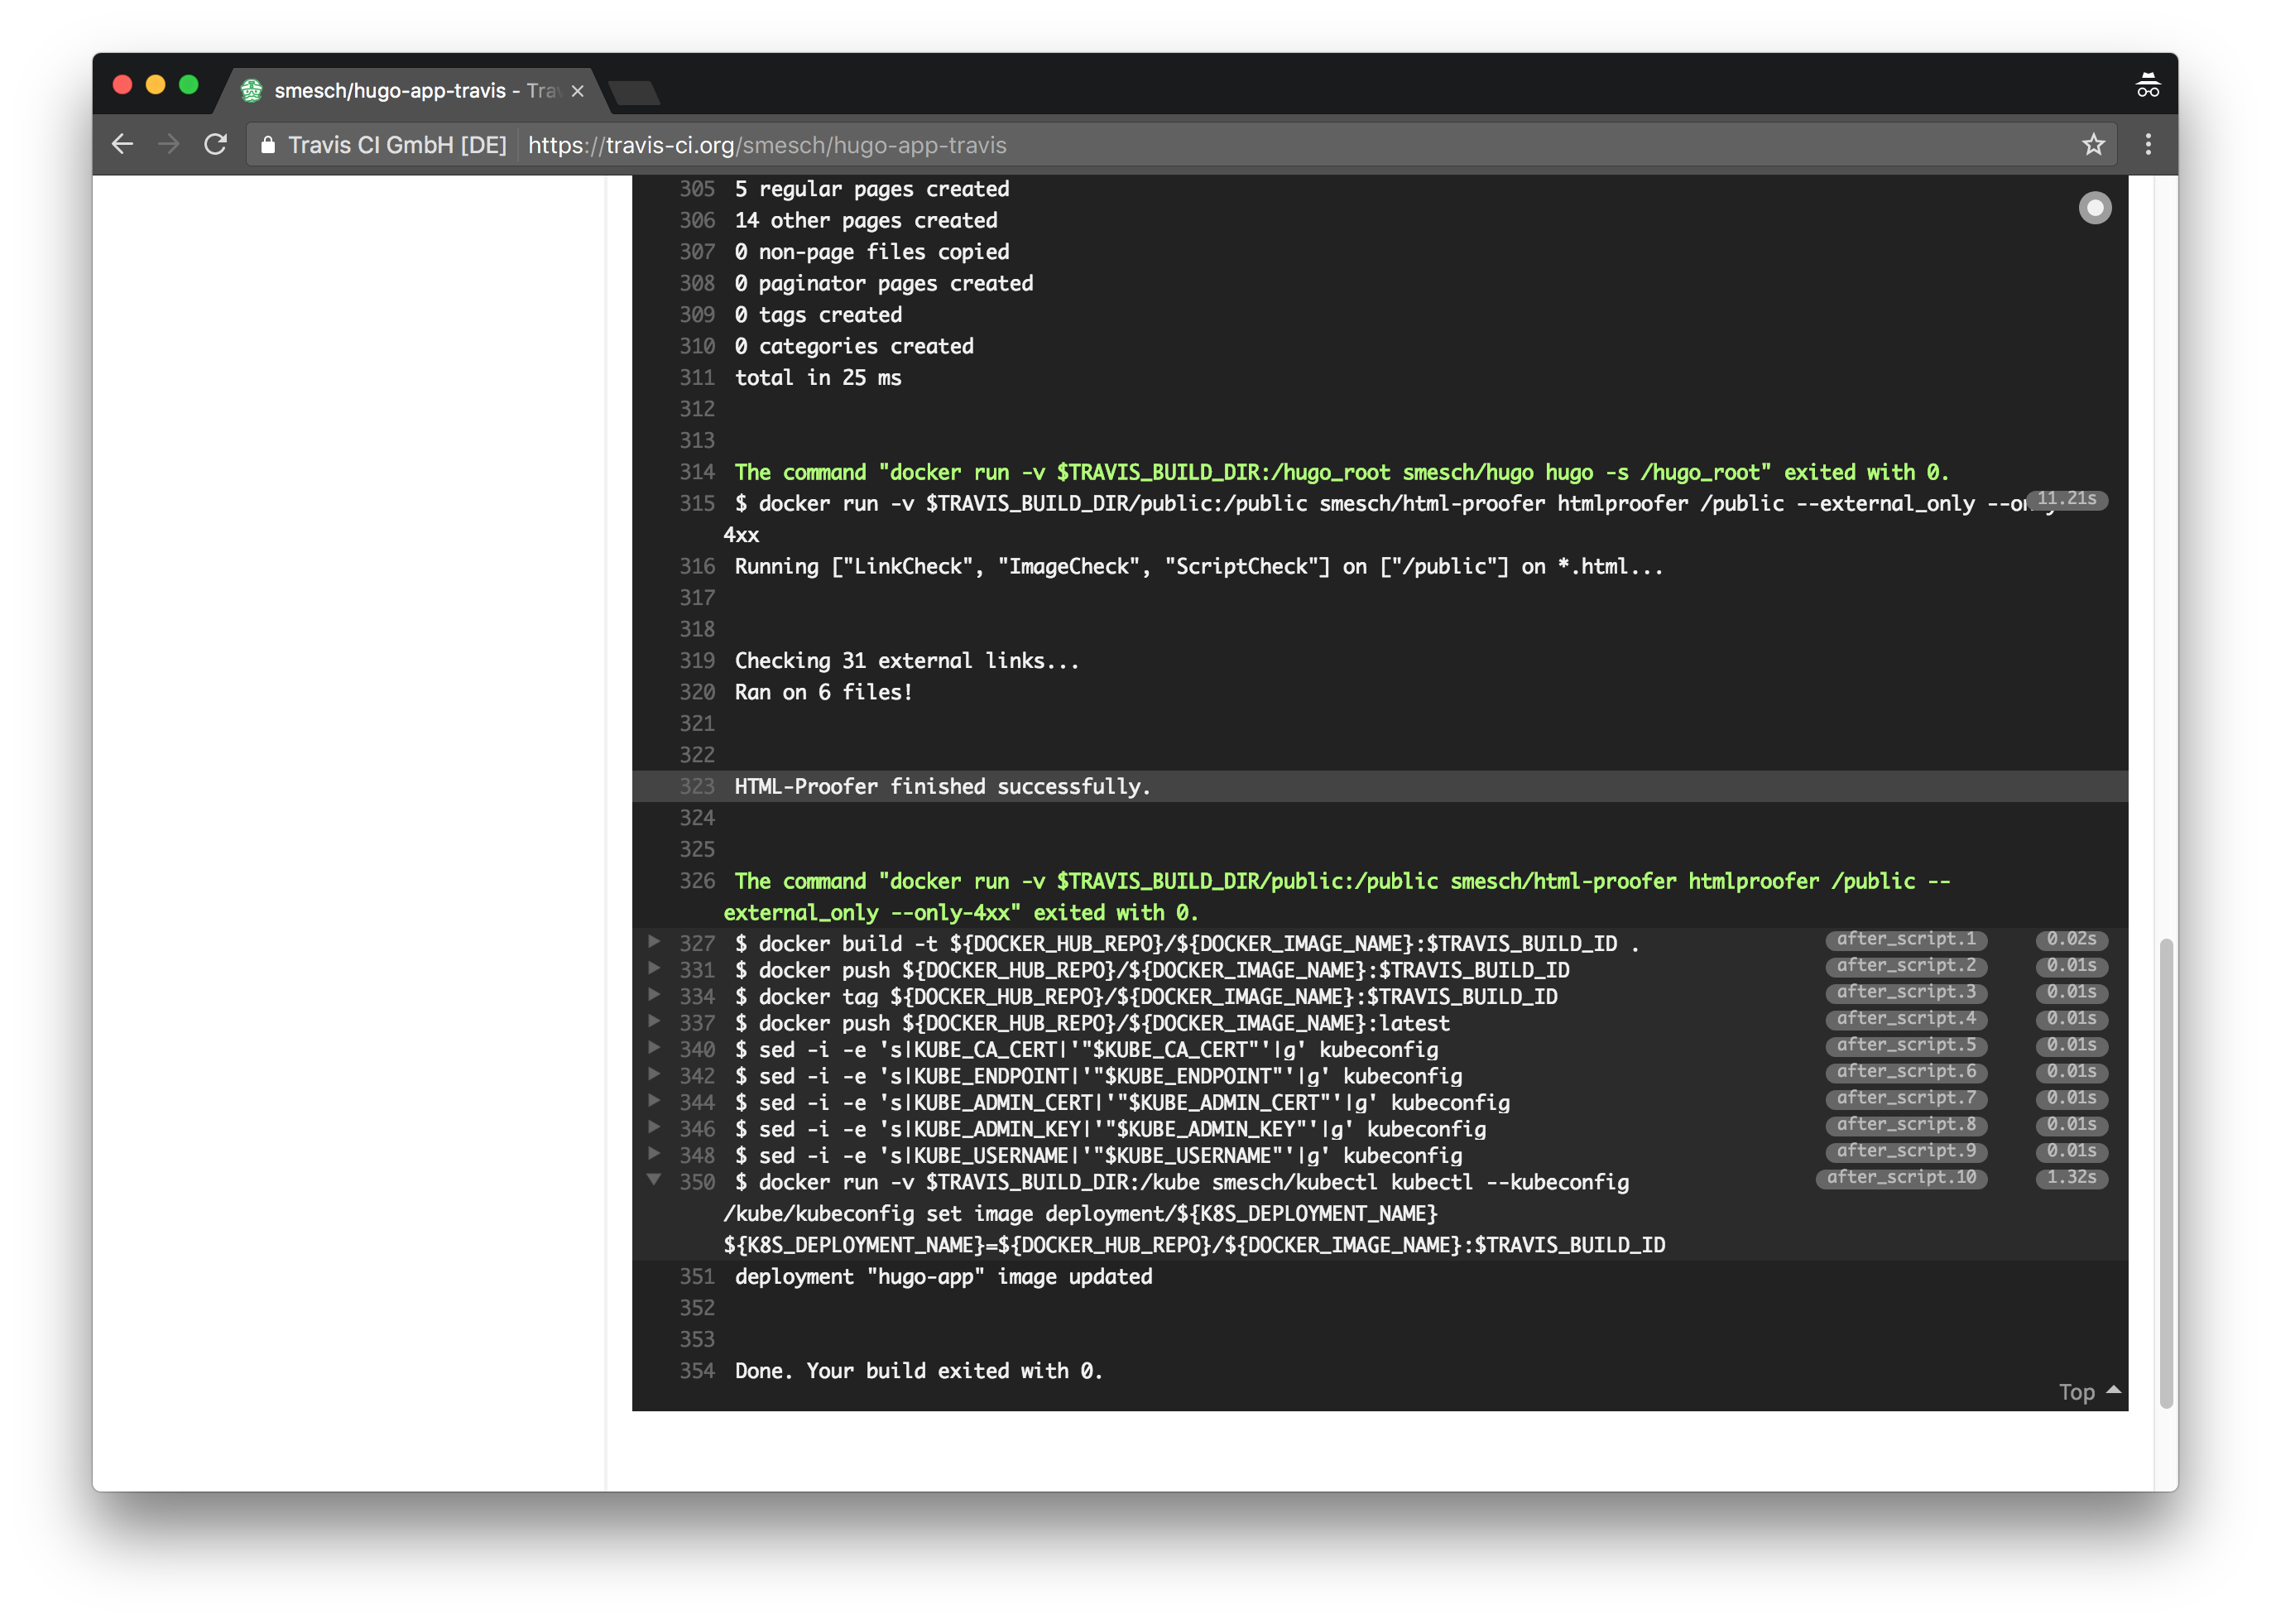
Within a few seconds of committing the change to GitHub, the Travis CI pipeline should be started automatically. You can see the pipeline running in real-time by clicking on the Current tab of the repository on the Travis CI site:
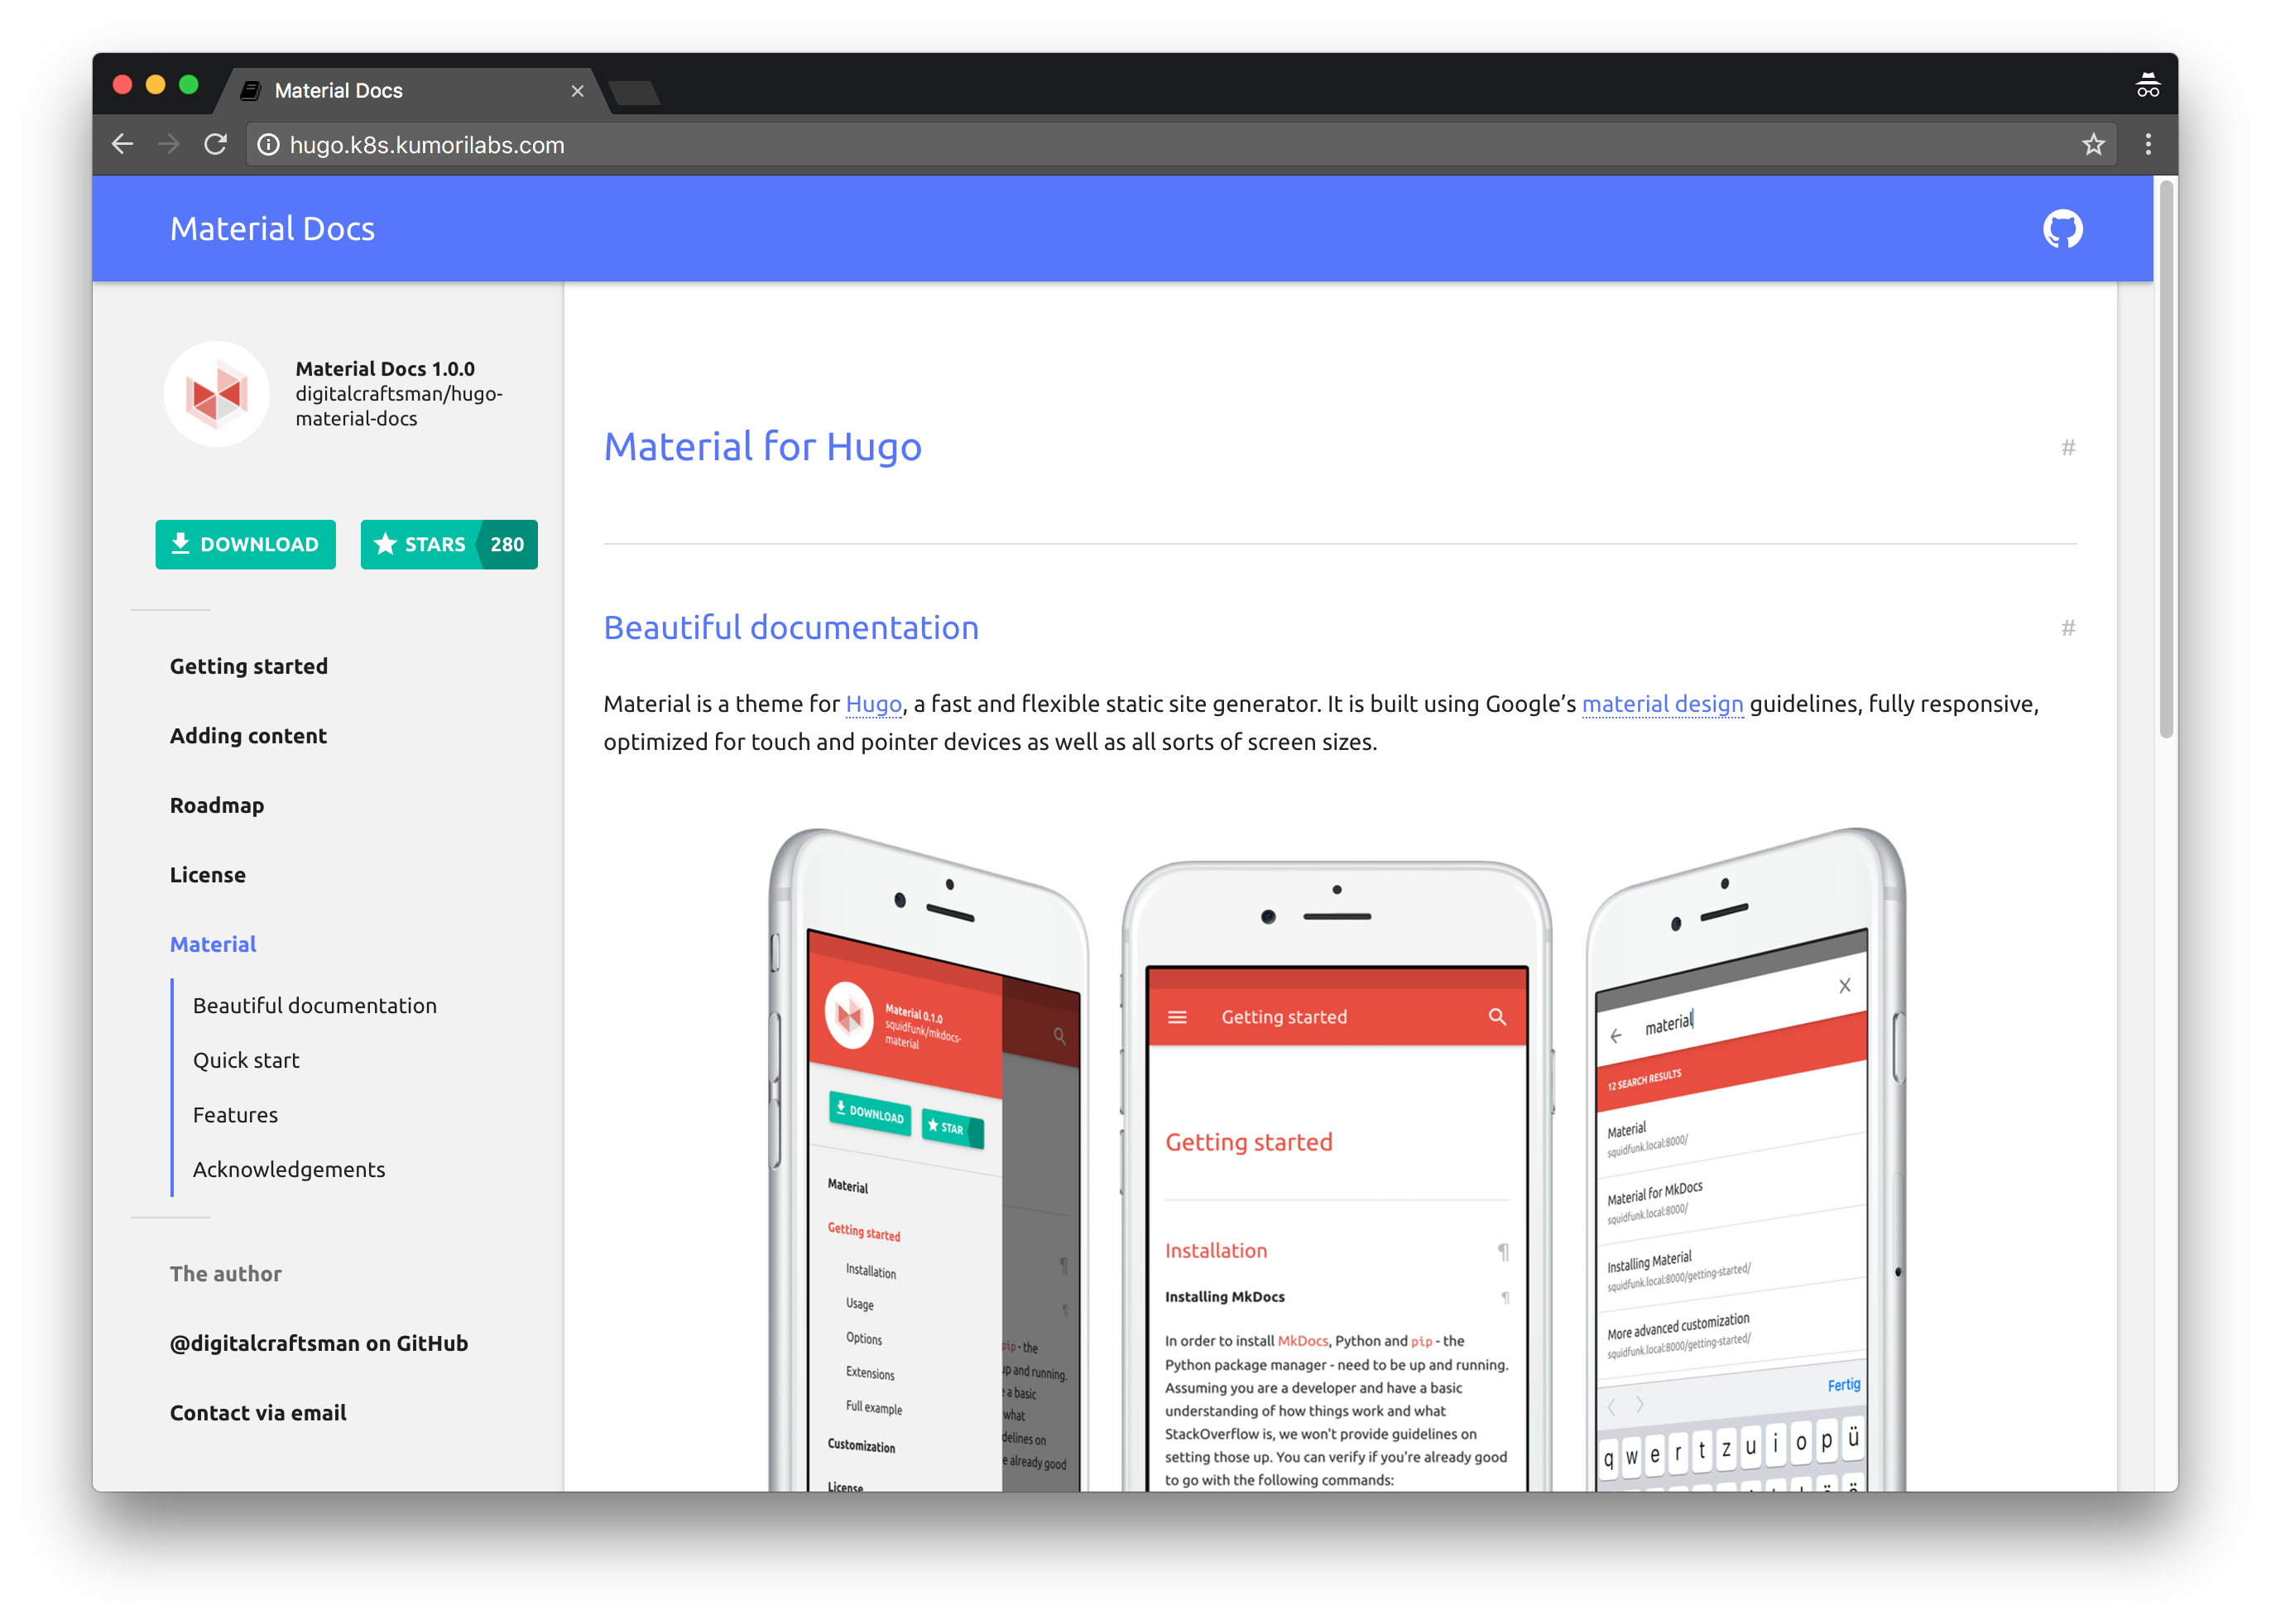
And when it completes, the theme color of the site will be blue:
You now have a fully functional continuous deployment pipeline setup in Travis CI.
Cleanup
Before proceeding to the next lab, delete the cluster and it’s associated S3 bucket:
Delete the cluster
Delete the cluster:
kops delete cluster ${CLUSTER_FULL_NAME} --yes
Delete the S3 bucket in AWS:
aws s3api delete-bucket --bucket ${CLUSTER_FULL_NAME}-state
In addition to the step-by-step instructions provided for each lab, the repository also contains scripts to automate some of the activities being performed in this blog series. See the Using Scripts guide for more details.
Next Up
In the next lab, Lab #9: Continuous Deployment with Wercker and Kubernetes, we will go through the following:
- Creating a continuous deployment pipeline in Wercker for the Hugo site
- Testing the pipeline in Wercker
Other Labs in the Series
- Introduction: A Blog Series About All Things Kubernetes
- Lab #1: Deploy a Kubernetes Cluster in AWS with Kops
- Lab #2: Maintaining your Kubernetes Cluster
- Lab #3: Creating Deployments & Services in Kubernetes
- Lab #4: Kubernetes Deployment Strategies: Rolling Updates, Canary & Blue-Green
- Lab #5: Setup Horizontal Pod & Cluster Autoscaling in Kubernetes
- Lab #6: Integrating Jenkins and Kubernetes
- Lab #7: Continuous Deployment with Jenkins and Kubernetes
- Lab #9: Continuous Deployment with Wercker and Kubernetes
- Lab #10: Setup Kubernetes Federation Between Clusters in Different AWS Regions

