By Steven Eschinger | January 16, 2017
This post was updated on September 18th, 2017 for Kubernetes version 1.7.6 & Kops version 1.7.0
Introduction
In this first lab, we will deploy a Kubernetes cluster in AWS using Kops, the command line tool from Kubernetes for deploying production-grade clusters. The cluster will be located in a single availability zone, with one master and two nodes. You will also see what options to change if you want to deploy a high-availability (HA) cluster spread across different availability zones and with multiple masters.
Once the cluster is operational, you will see how to check the status of the cluster and the cluster controlling services (API server, controller manager, scheduler, etc.) running on the master.
And finally, you will see how to completely delete the cluster and all it’s associated objects in AWS with Kops.
Activities
Warning: Some of the AWS resources that will be created in the following lab are not eligible for the AWS Free Tier and therefore will cost you money. For example, running a three node cluster with the suggested instance size of t2.medium will cost you around $0.20 per hour based on current pricing.
Prerequisites
Review the Getting Started section in the introductory post of this blog series
Log into the Vagrant box or your prepared local host environment
Update and then load the required environment variables:
# Must change: Your domain name that is hosted in AWS Route 53
export DOMAIN_NAME="k8s.kumorilabs.com"

# Friendly name to use as an alias for your cluster
export CLUSTER_ALIAS="usa"

# Leave as-is: Full DNS name of you cluster
export CLUSTER_FULL_NAME="${CLUSTER_ALIAS}.${DOMAIN_NAME}"

# AWS availability zone where the cluster will be created
export CLUSTER_AWS_AZ="us-east-1a"
Implementation
Deploy a new cluster
We will first create a S3 bucket directly in AWS, which Kops will use to store all of the cluster configuration information:
aws s3api create-bucket --bucket ${CLUSTER_FULL_NAME}-state
Set the KOPS_STATE_STORE variable to the URL of the S3 bucket that was just created:
export KOPS_STATE_STORE="s3://${CLUSTER_FULL_NAME}-state"
Create the cluster configuration with Kops, with the required options below:
- --name=
${CLUSTER_FULL_NAME}- Full DNS name of your cluster, which will be the cluster alias + your domain name (e.g., usa.k8s.kumorilabs.com) - --zones=
${CLUSTER_AWS_AZ}- AWS availability zone where your cluster will be deployed - --master-size=
t2.medium- EC2 instance size for the master - --node-size=
t2.medium- EC2 instance size for the nodes - --node-count=
2- Number of nodes that will be deployed in the cluster - --dns-zone=
${DOMAIN_NAME}- Your domain name that is hosted in AWS Route 53 - --ssh-public-key=
~/.ssh/id_rsa.pub- Path to your SSH public key; change if your key is stored in a different location - --kubernetes-version=
1.7.6- Version of Kubernetes that will be installed in the cluster
kops create cluster \
    --name=${CLUSTER_FULL_NAME} \
    --zones=${CLUSTER_AWS_AZ} \
    --master-size="t2.medium" \
    --node-size="t2.medium" \
    --node-count="2" \
    --dns-zone=${DOMAIN_NAME} \
    --ssh-public-key="~/.ssh/id_rsa.pub" \
    --kubernetes-version="1.7.6"
If you want to deploy a HA cluster spread across multiple availability zones, you will need to modify the kops create cluster command above to specify at least 3 AWS availability zones (3 is required for the cluster to achieve quorum) for the masters and nodes. And it would also be a good idea to increase the amount of nodes as well:
- --master-zones=
us-east-1a,us-east-1b,us-east-1d - --zones=
us-east-1a,us-east-1b,us-east-1d - --node-count=
6
Now that the cluster configuration has been created and uploaded to the S3 bucket, you can review it before the cluster gets created in AWS:
kops edit cluster ${CLUSTER_FULL_NAME}
This will bring up a text editor with the cluster configuration, where you can make any final changes before creating the cluster:
apiVersion: kops/v1alpha2
kind: Cluster
metadata:
  creationTimestamp: 2017-09-18T17:15:41Z
  name: usa.k8s.kumorilabs.com
spec:
  api:
    dns: {}
  authorization:
    alwaysAllow: {}
  channel: stable
  cloudProvider: aws
  configBase: s3://usa.k8s.kumorilabs.com-state/usa.k8s.kumorilabs.com
  dnsZone: k8s.kumorilabs.com
  etcdClusters:
  - etcdMembers:
    - instanceGroup: master-us-east-1a
      name: a
    name: main
  - etcdMembers:
    - instanceGroup: master-us-east-1a
      name: a
    name: events
  kubernetesApiAccess:
  - 0.0.0.0/0
  kubernetesVersion: 1.7.6
  masterInternalName: api.internal.usa.k8s.kumorilabs.com
  masterPublicName: api.usa.k8s.kumorilabs.com
  networkCIDR: 172.20.0.0/16
  networking:
    kubenet: {}
  nonMasqueradeCIDR: 100.64.0.0/10
  sshAccess:
  - 0.0.0.0/0
  subnets:
  - cidr: 172.20.32.0/19
    name: us-east-1a
    type: Public
    zone: us-east-1a
  topology:
    dns:
      type: Public
    masters: public
    nodes: public
Exit out of the text editor (save the file if you made any changes) and you now ready to deploy the cluster in AWS:
kops update cluster ${CLUSTER_FULL_NAME} --yes
Kops will now create the following objects in your AWS environment:
- Dedicated VPC for the cluster
- EC2 instances for the master and nodes
- Route 53 DNS record for API server access
- Security group to allow inbound access to the API server
It will take approximately five minutes for the cluster to be ready. In the meantime, we will create a cluster context alias in your kubeconfig file, which will make things easier for future posts when dealing with multiple clusters:
kubectl config set-context ${CLUSTER_ALIAS} --cluster=${CLUSTER_FULL_NAME} \
        --user=${CLUSTER_FULL_NAME}
You now have a cluster context in your local kubeconfig file with the friendly name you specified for the CLUSTER_ALIAS variable. We will now tell kubectl to use this new cluster context:
kubectl config use-context ${CLUSTER_ALIAS}
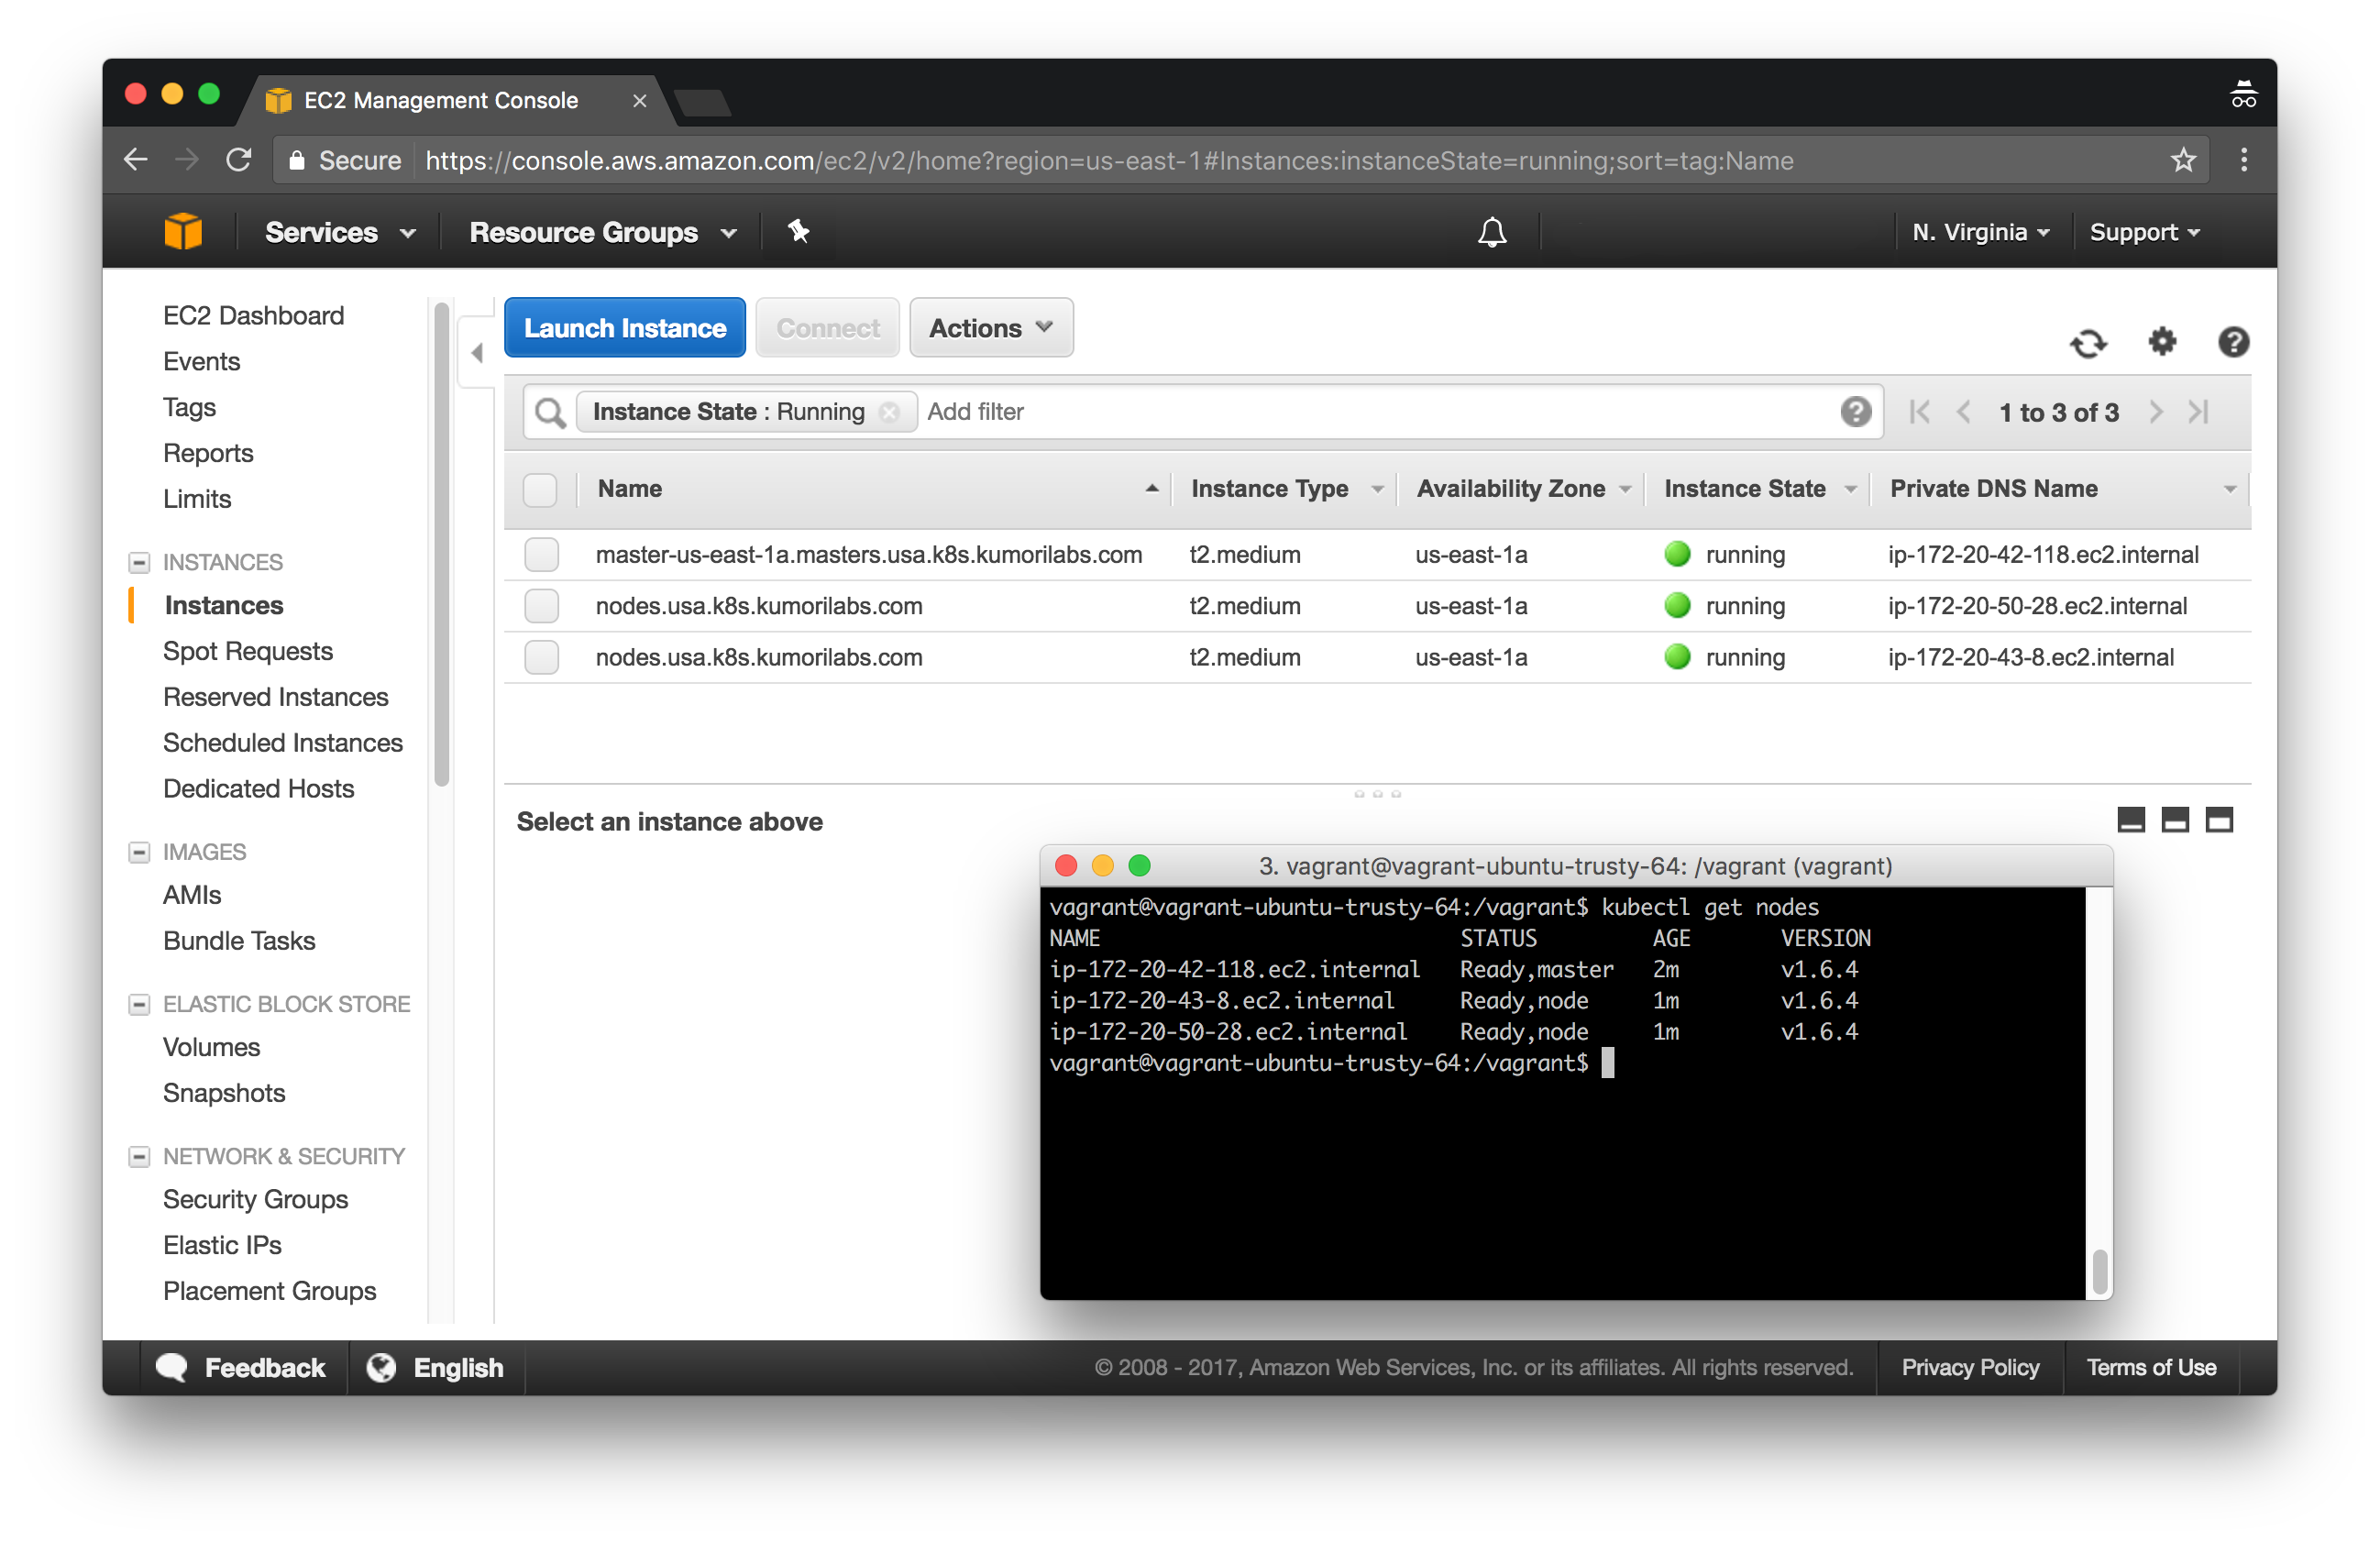
Check the status of the cluster
To check if your cluster is ready:
kubectl get nodes
NAME                            STATUS    AGE       VERSION
ip-172-20-34-47.ec2.internal    Ready     2m        v1.7.6
ip-172-20-36-199.ec2.internal   Ready     39s       v1.7.6
ip-172-20-47-94.ec2.internal    Ready     58s       v1.7.6
To view the cluster contexts, which includes the alias you created:
kubectl config get-contexts
CURRENT   NAME                     CLUSTER                  AUTHINFO                 NAMESPACE
          usa.k8s.kumorilabs.com   usa.k8s.kumorilabs.com   usa.k8s.kumorilabs.com
*         usa                      usa.k8s.kumorilabs.com   usa.k8s.kumorilabs.com
To check the status of the cluster controlling services running on the master:
kubectl get pods --namespace=kube-system
NAME                                                   READY     STATUS    RESTARTS   AGE
dns-controller-1770785780-pvz14                        1/1       Running   0          2m
etcd-server-events-ip-172-20-34-47.ec2.internal        1/1       Running   0          2m
etcd-server-ip-172-20-34-47.ec2.internal               1/1       Running   0          1m
kube-apiserver-ip-172-20-34-47.ec2.internal            1/1       Running   0          2m
kube-controller-manager-ip-172-20-34-47.ec2.internal   1/1       Running   0          2m
kube-dns-479524115-xc2h8                               3/3       Running   0          2m
kube-dns-479524115-zllxx                               3/3       Running   0          1m
kube-dns-autoscaler-1818915203-73xjn                   1/1       Running   0          2m
kube-proxy-ip-172-20-34-47.ec2.internal                1/1       Running   0          1m
kube-proxy-ip-172-20-36-199.ec2.internal               1/1       Running   0          1m
kube-proxy-ip-172-20-47-94.ec2.internal                1/1       Running   0          1m
kube-scheduler-ip-172-20-34-47.ec2.internal            1/1       Running   0          1m
Cleanup
Before proceeding to the next lab, delete the cluster and it’s associated S3 bucket:
Delete the cluster
Delete the cluster:
kops delete cluster ${CLUSTER_FULL_NAME} --yes
Delete the S3 bucket in AWS:
aws s3api delete-bucket --bucket ${CLUSTER_FULL_NAME}-state
In addition to the step-by-step instructions provided for each lab, the repository also contains scripts to automate some of the activities being performed in this blog series. See the Using Scripts guide for more details.
Next Up
In the next lab, Lab #2: Maintaining your Kubernetes Cluster, we will go through the following:
- Upgrading a cluster
- Increasing the number of nodes in a cluster
- Performing maintenance on a node
- Deploying the Kubernetes dashboard to a cluster
Other Labs in the Series
- Introduction: A Blog Series About All Things Kubernetes
- Lab #2: Maintaining your Kubernetes Cluster
- Lab #3: Creating Deployments & Services in Kubernetes
- Lab #4: Kubernetes Deployment Strategies: Rolling Updates, Canary & Blue-Green
- Lab #5: Setup Horizontal Pod & Cluster Autoscaling in Kubernetes
- Lab #6: Integrating Jenkins and Kubernetes
- Lab #7: Continuous Deployment with Jenkins and Kubernetes
- Lab #8: Continuous Deployment with Travis CI and Kubernetes
- Lab #9: Continuous Deployment with Wercker and Kubernetes
- Lab #10: Setup Kubernetes Federation Between Clusters in Different AWS Regions